
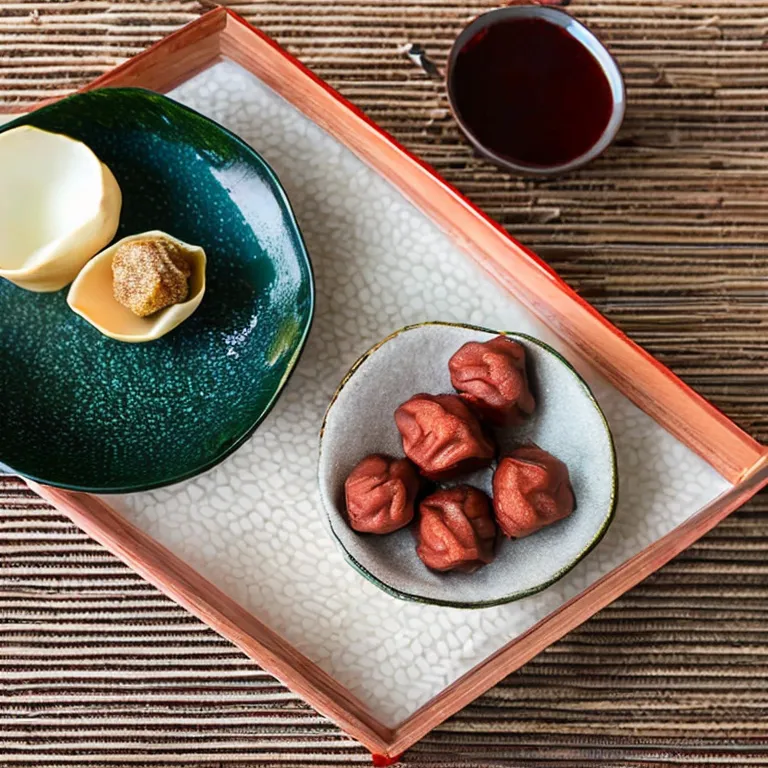
Umeboshi is a traditional Japanese pickled plum that the whole family can enjoy - perfect as a condiment, mixed into rice or as a tangy flavour accent; made with tart ume plums preserved with salt and shiso leaves, this wholesome version is toddler-friendly when used sparingly, introduces complex sour flavours, great for expanding your child’s palate and can be adapted to use less salt, mashed into rice balls for easier eating, or introduced in tiny amounts for fussier eaters; follow this simple recipe for an authentic Japanese preserved food that brings traditional flavours to your family table while respecting your toddler’s developing taste preferences and keeping everything safe and interesting.
General Information
- Servings: 8 small portions (about 30 to 40 g each)
- Keywords: umeboshi-style, plum spread, no salt, no added sugar, toddler, peanut-free
- Calories (per serving, approx): 20 kcal
- Protein (per serving, approx): 0.3 g
- Carbs (per serving, approx): 4.5 g
- Fats (per serving, approx): 0.1 g
- Preparation time: 20 minutes
- Cooking time: 20-25 minutes
Hi, I’m Susan. I’m a stay-at-home mum with two picky little eaters and a background in professional cooking, mostly western cuisine. I love finding ways to make new things toddler-safe and tasty. This is my salt-free, sugar-free, toddler-friendly take on umeboshi. It won’t be the salty classic you get in Japan, but it keeps that bright, tangy plum vibe in a soft, spreadable form that small kids can safely eat.
Ingredients
- Fresh plums (preferably small, slightly tart variety): 600 g (about 8-10 small plums)
- Apple (for gentle natural sweetness and body): 50 g, peeled and grated (about half a small apple)
- Fresh lemon juice: 15 mL (1 tablespoon)
- Water: 60 mL (about 1/4 cup), plus extra to thin if needed
- Olive oil or neutral vegetable oil (optional): 5 mL (1 teaspoon) to give a silkier texture for spreading
- Optional: a very small pinch of ground cinnamon or a single tiny fresh basil leaf, finely chopped, only if your child has tried these before and had no reaction
Equipment
- Small saucepan
- Wooden spoon or silicone spatula
- Paring knife and chopping board
- Measuring spoons and kitchen scale
- Bowl and spoon
- Fork, potato masher, or stick blender (immersion blender)
- Fine mesh sieve (optional, if you want ultra-smooth texture)
- Small sterile jar with lid for storage
Notes on ingredients
- No added salt or sugar. Fruit supplies natural flavor. Lemon brightens the taste without adding sugar.
- I avoid anything with peanuts or obvious high salt or high sugar content.
- If you cannot source plums, you can use 600 g of any tart stone fruit, but the flavour will change.
Ingredients preparation (very detailed so a beginner can follow)
- Wash your hands and clean your workspace.
- Rinse the plums under cool running water. Pat dry with a clean tea towel.
- To pit the plums safely:
- Place a plum on the chopping board. Using a small paring knife, put the tip near the stem, make a shallow cut around the top in a circle, then use your thumbs to give the two halves a gentle twist apart. The stone should stay in one half.
- Use the tip of the knife or a small spoon to lift out the stone. If the stone is stubborn, cut a little deeper, but only a thin slice.
- If this feels tricky, you can cut the plum in half through the stone and scoop it out. Keep pieces small so they cook quickly.
- Chop the pitted plum flesh into roughly 2 cm pieces. For toddlers, smaller pieces are easier to cook and mash.
- Peel the apple with a peeler, then grate it on the coarse side of a box grater into the bowl. Grated apple melts into the sauce and avoids lumps.
- Measure out 60 mL of water and 15 mL lemon juice. Have everything ready before you turn on the stove.
Directions
- Put a medium saucepan on the stove. Add the chopped plums, grated apple, and 60 mL water.
- Joke moment: If your kids ask where their magic potion is, tell them it’s in the saucepan and it needs a nap on low heat.
- Turn the heat to medium-low and bring the fruit to a gentle simmer. You should see a few small bubbles, not a roaring boil. Stir gently with a wooden spoon so nothing sticks.
- If you are new to cooking, this is the time to stand by and watch. Don’t walk away for too long.
- Simmer gently, uncovered, for 12-15 minutes. The fruit should become very soft and start to break down. Check after 10 minutes and stir every few minutes to prevent sticking. If the pan looks dry, add 1-2 tablespoons (15-30 mL) of water.
- How to tell it’s ready: a spoon should be able to mash a piece easily and the mixture should look like soft compote.
- Turn off the heat. Add the lemon juice and the optional 5 mL oil. Stir to combine.
- Lemon keeps things bright and gives a pleasant tartness similar to umeboshi without salt.
- For toddlers you want a smooth, safe texture. Choose one of these methods:
- Fork or potato masher: Mash the mixture in the pan until as smooth as you can get it. This takes a little elbow grease but is fine for a rustic spread.
- Stick blender: Keep the pan on a cool surface and blitz a few short pulses with an immersion blender until smooth.
- Fine sieve: If you want ultra-smooth, push the cooked fruit through a fine mesh sieve with the back of a spoon. This removes any tiny fibres or skin bits that could be tricky for some little mouths.
- Taste a small amount once cooled a little. If it’s too tangy, stir in a teaspoon of additional grated apple or a little extra cooked apple purée to balance the sourness. Do not add sugar.
- Safety check: Let the puree cool to lukewarm or room temperature before giving it to a toddler. Test with your fingertip to be sure.
- Portion the spread into a clean jar. Cool to room temperature, then refrigerate. It will keep in the fridge for about 4-5 days. For longer storage, freeze in small portions (ice cube tray or small silicone moulds) and thaw as needed.
- Serving tip: Warm a tiny spoonful to take the chill off if you like. Always stir and test temperature before serving.
Serving size and texture tips for toddlers
- For very young toddlers, spread thinly on soft toast strips cut long and narrow to avoid choking.
- For babies starting solids, thin with a little breastmilk, formula, or plain yoghurt to a runnier consistency.
- Always supervise while eating and make sure pieces are very soft or fully pureed.
Recommended Sides
- Soft steamed rice, cooled slightly, mixed with a little plum spread for a gentle flavour boost.
- Warm porridge or oats: stir 1 teaspoon to 1 tablespoon of the plum spread into a toddler bowl for a tangy twist.
- Soft mashed sweet potato or pumpkin: mix through one or two teaspoons for variety.
- Plain yoghurt (unsweetened) with a swirl of plum spread on top. Offer in a shallow dish and watch for spoon play.
- Soft toast strips or wholemeal finger pancakes, cut into long thin strips to minimise choking risk.
- Mild cooked chicken mince or shredded chicken mixed with a small amount of plum spread for an adventurous, toddler-safe combo.
- Frozen portions can be popped into smoothies for older toddlers who can drink from a cup.
Jokes
- Why did the plum go to school? Because it wanted to be a little brighter. My kids call this the “clever plum spread.”
- If a plum could sing, I think it would choose nursery rhymes. Mostly because it likes to be mashed to the rhythm.
- I once told my kids this spread was “grown-up tang in a tiny jacket.” They asked for peanut butter instead. No peanut butter here, mate.
- Cooking tip from me: if the pot starts telling you jokes, you may be hungry. Serve a sample to the family and see who giggles first.
Final notes from me, Susan
- This is a homemade, no-salt, no-sugar approach to getting that sharp plum character into something toddlers will safely eat. It is not a traditional umeboshi, which relies on salt and a special pickling method. This recipe honours the flavour direction while keeping things safe.
- Always check for other allergies before serving new ingredients. Clean surfaces well if you keep peanut products in your house elsewhere.
- Have fun with it. My two kids argue over who gets the first spoonful every time. That is my kind of cooking win.
Shop Ingredients
Find these ingredients on Amazon:
As an Amazon Associate I earn from qualifying purchases.
Suggested Recipes


You Might Also Like
 Never miss a recipe from us, subscribe to our newsletter