
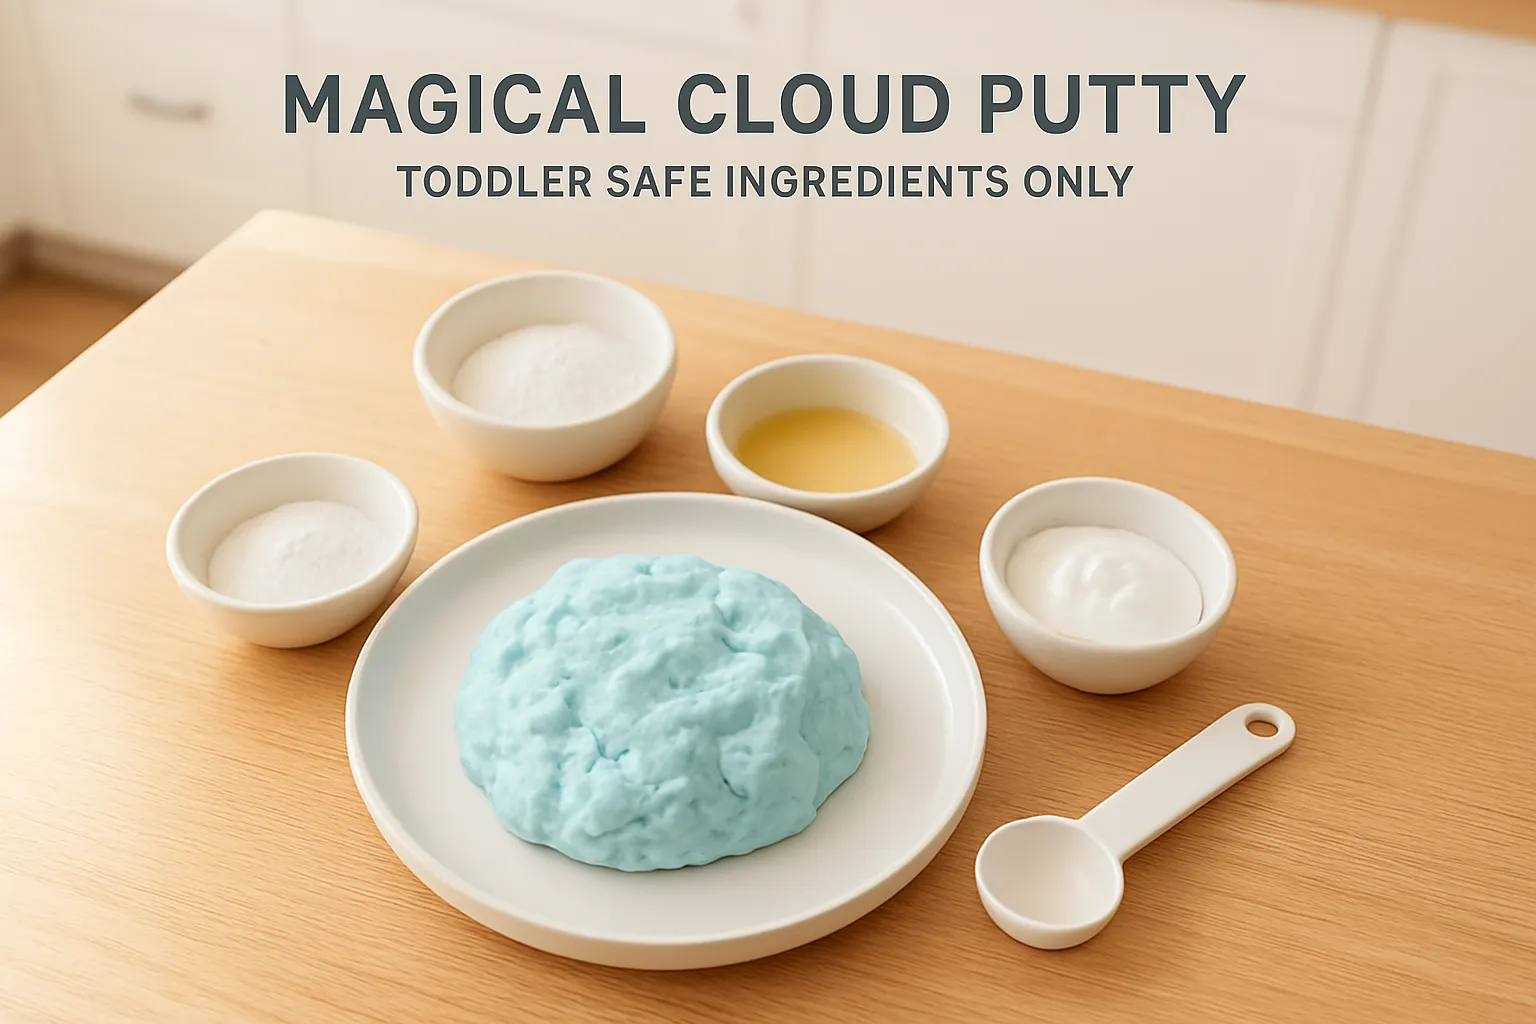
Simple recipe for magical cloud putty for toddlers
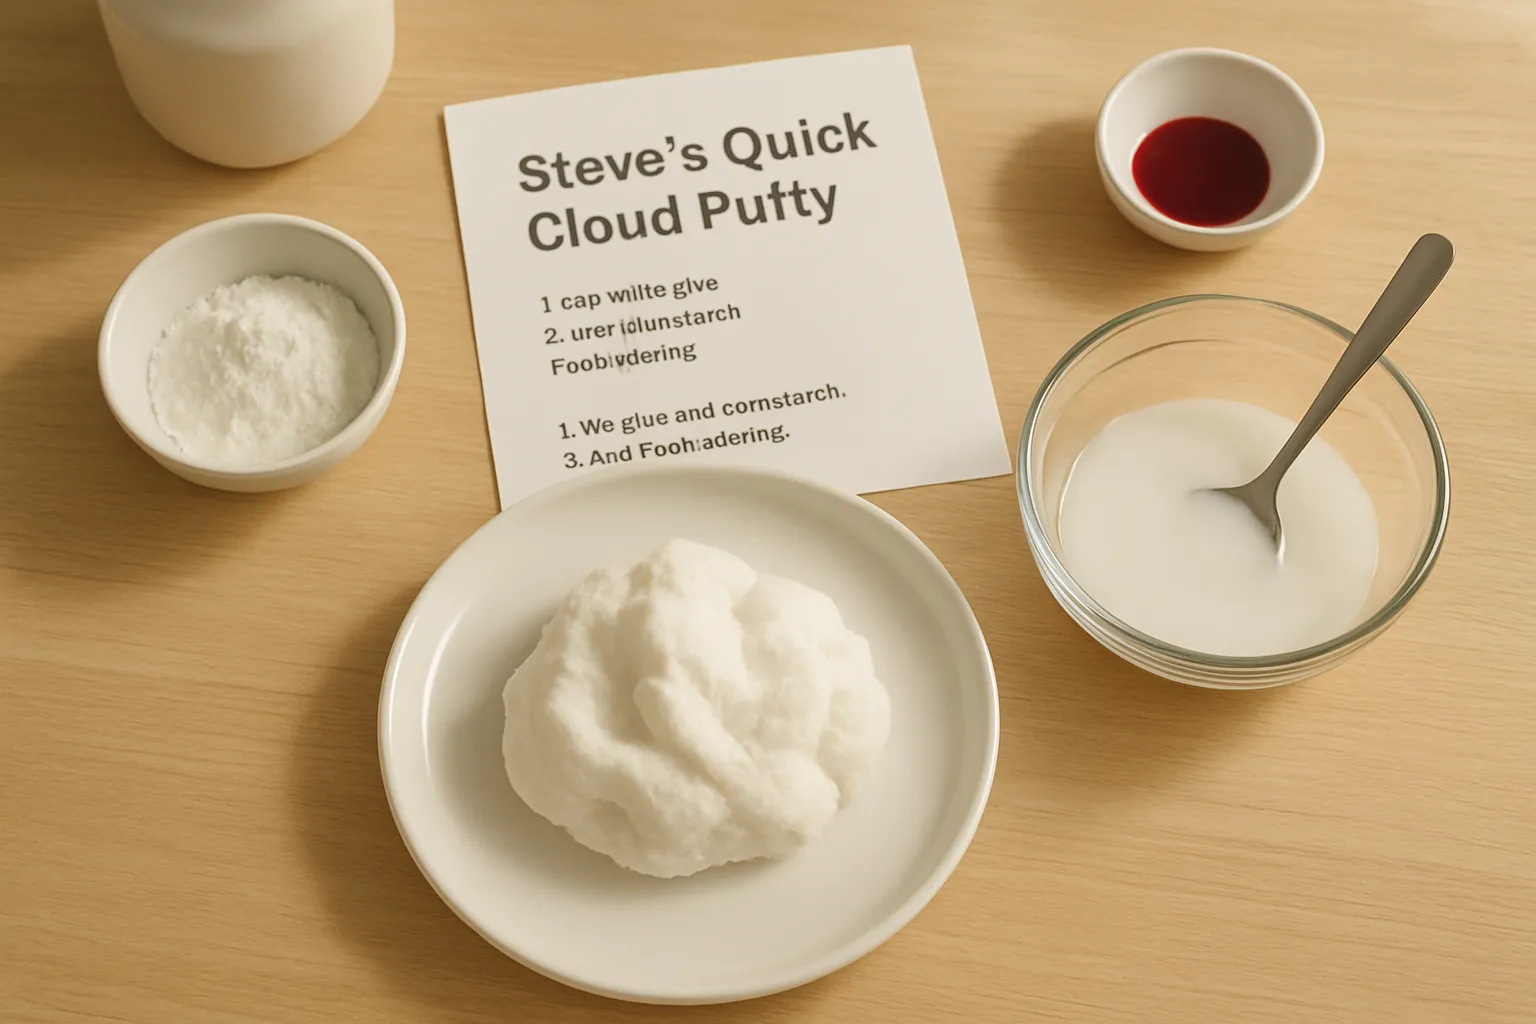
Just a quick one to get you set up - this is Steve’s go-to for a fast, squishy batch that toddlers can dive straight into.
Ingredients (small batch)
- 4 cups plain all-purpose flour
- 1/3 to 1/2 cup vegetable oil or melted coconut oil (start small)
- Optional: a few drops of food colouring mixed into the oil, or 1 teaspoon vanilla for a gentle scent
Method
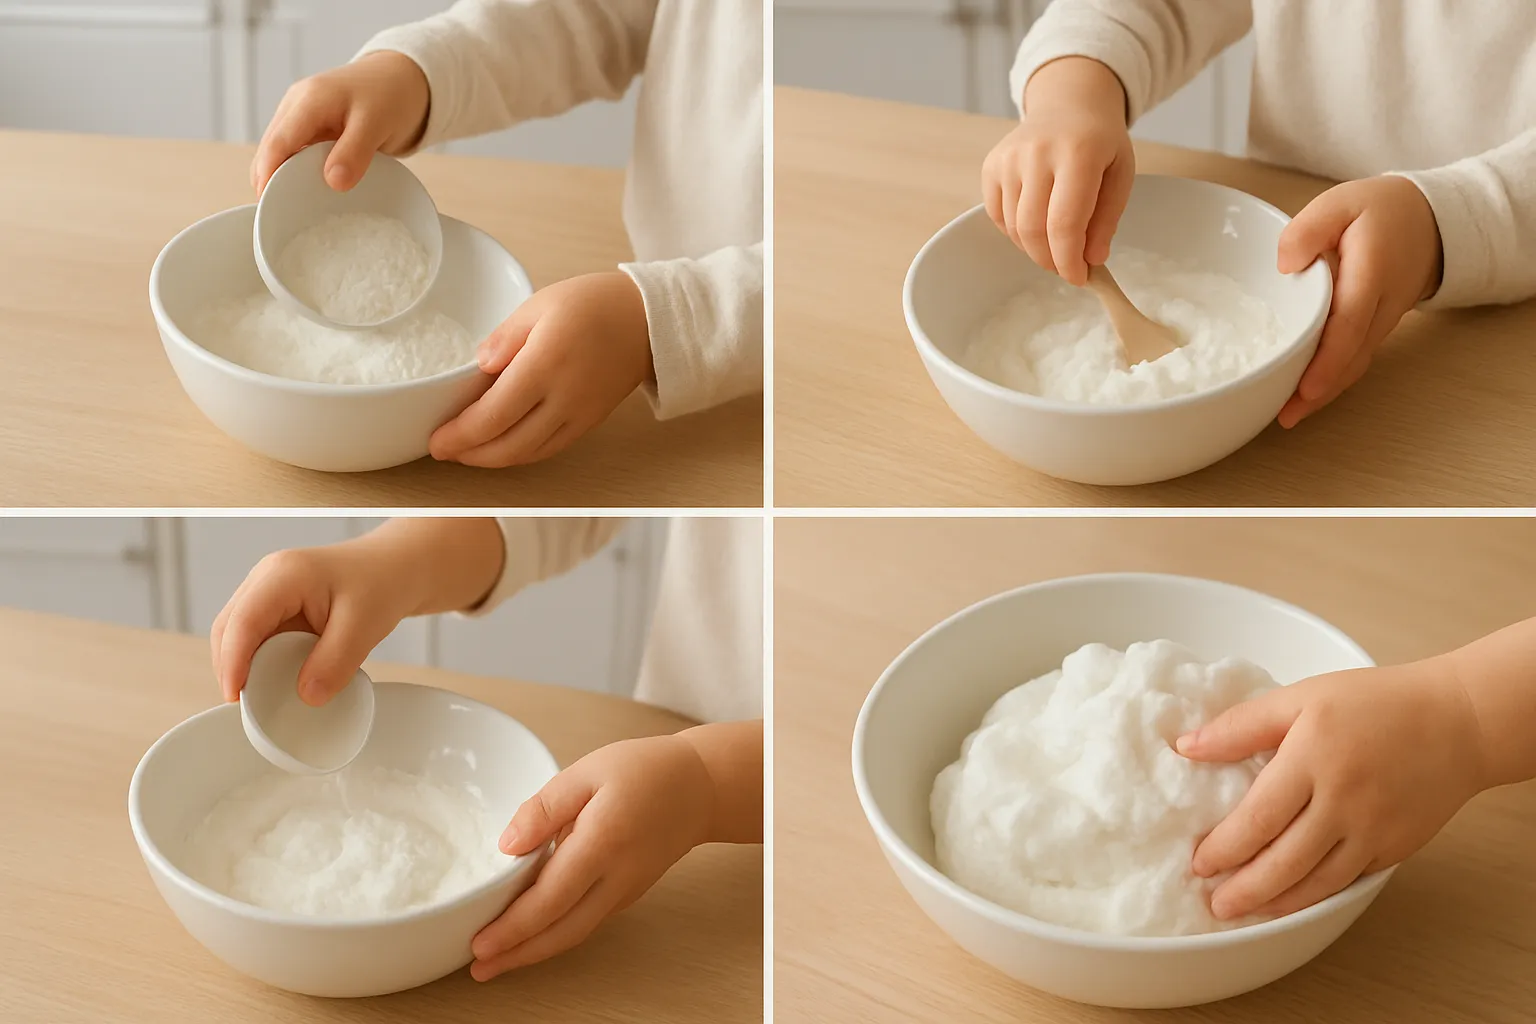
- Tip the flour into a big mixing bowl or onto a tray you don’t mind getting messy.
- Put 1/3 cup oil into a small cup. If you want colour, add the drops of food colouring to the oil now so it spreads evenly.
- Pour the oil over the flour and use your hands to mix. Press, rub and squeeze until it holds together when you make a handful. Add up to the extra 2 tablespoons if it still feels dry. The texture you want is crumbly but mouldable, something that squishes into shape and then crumbles apart.
- If it ends up too oily, sprinkle in more flour a little at a time. Too dry, add a tiny splash more oil. You can make this to any size by keeping roughly an 8 to 1 flour to oil ratio.
Play ideas straight away
- Give toddlers cups, spoons, cookie cutters and little trucks for imaginative digging and moulding.
- Press into small silicone moulds for instant “cloud cakes.”
- Try scooping and pouring between containers to practice motor skills and language.
Storage and quick fixes
- Keep leftover putty in an airtight container for up to two weeks. If it smells off or gets wet, toss and make a fresh batch.
- If it sticks to hands, dust hands lightly with flour or pop a baking tray under play to catch the crumbs.
- Always supervise little ones while they play.
Simple, quick, and you can have it ready in less than five minutes once you’ve got the ingredients out.
Keep the ingredient list short, simple and as edible as you can. Toddlers explore with mouths and hands, so pick things that won’t cause harm if a tiny taste happens and avoid anything with strong chemicals or tiny bits they could swallow.
Safe base ingredients (easy, non-toxic)
- Cornflour (cornstarch): silky, mouldable and non-toxic. Great for oobleck or cornflour putty. Small batch guide: 1 cup cornflour + 1/2 cup water for oobleck (mix until you get that goopy, hard-when-smashed feel). For a drier putty try 1 cup cornflour + 1/3 cup vegetable oil (about 80 ml).
- Plain (wheat) flour + oil: makes a lovely cloud-dough style putty that’s soft and crumbly but holds shape. Try 2 cups plain flour + 1/2 cup vegetable oil (about 120 ml). Note: flour is not sterile and can be dusty, so supervise closely.
- Food-grade cooking oil: sunflower, canola or light olive oil. Use food oils over fragranced baby oil if you’re worried about mouthing.
- Water: just plain cold tap water for oobleck or for adjusting texture.
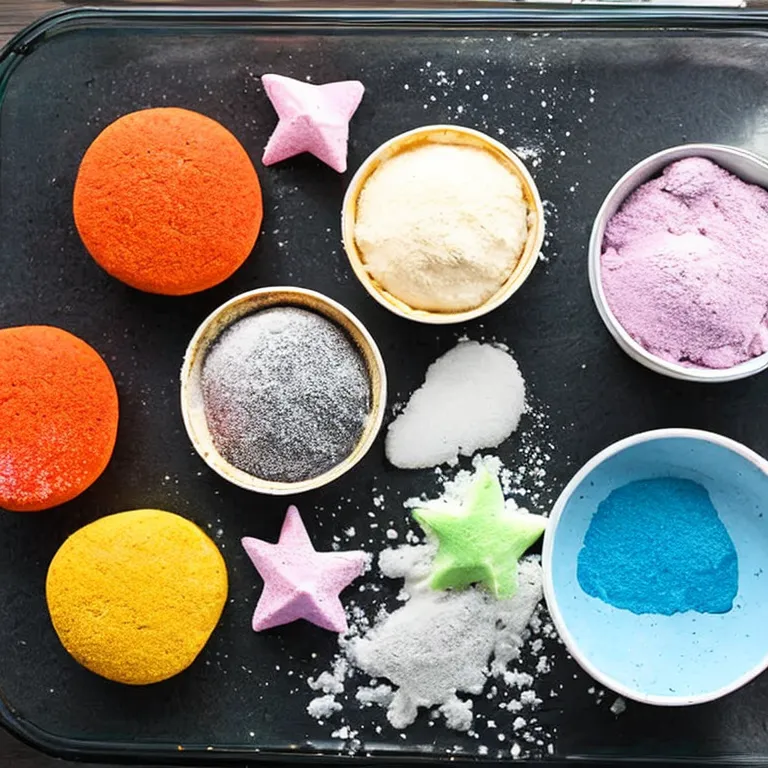
Colouring and sensory add-ins
- Liquid food colouring: a few drops only. It mixes in easily and is food-safe, but can stain clothes and surfaces - protect the play area.
- Natural colour options: beetroot juice, turmeric or cocoa can work but expect staining and smell changes. Use sparingly.
- Avoid glitter for toddlers - tiny sparkles are easy to lick or inhale. If you want sparkle, choose large, chunky, non-toxic craft bits only for older kids.
What to avoid
- Borax, borax-based detergents or contact-lens-solution + glue recipes. These can be irritating and are not suitable for toddlers.
- Strong essential oils or concentrated fragrances. Little noses are sensitive and some oils are toxic if swallowed.
- Super-fine powders, scented craft glitters, small beads or anything that’s a choking hazard.
- Shaving cream as a main ingredient for toddlers - it’s not designed for eating and can irritate if mouthed.
Allergy and safety notes
- Check for nut allergies before using nut oils. If in doubt, use neutral vegetable oil.
- If you have a child with severe food allergies, pick non-food craft materials labelled “toy-safe” or buy commercially tested sensory putty.
- Keep the batch small so if a child does taste some, the amount is limited. Always supervise and wash hands after play.
Quick safety checklist before you start
- Ingredients are labelled non-toxic or food-grade.
- No small or sharp bits included.
- Colouring chosen won’t ruin floors or clothes (or use washable mats).
- Supervision is ready.
Next up: clever ways to keep this play mess-minimal so you can actually enjoy it.
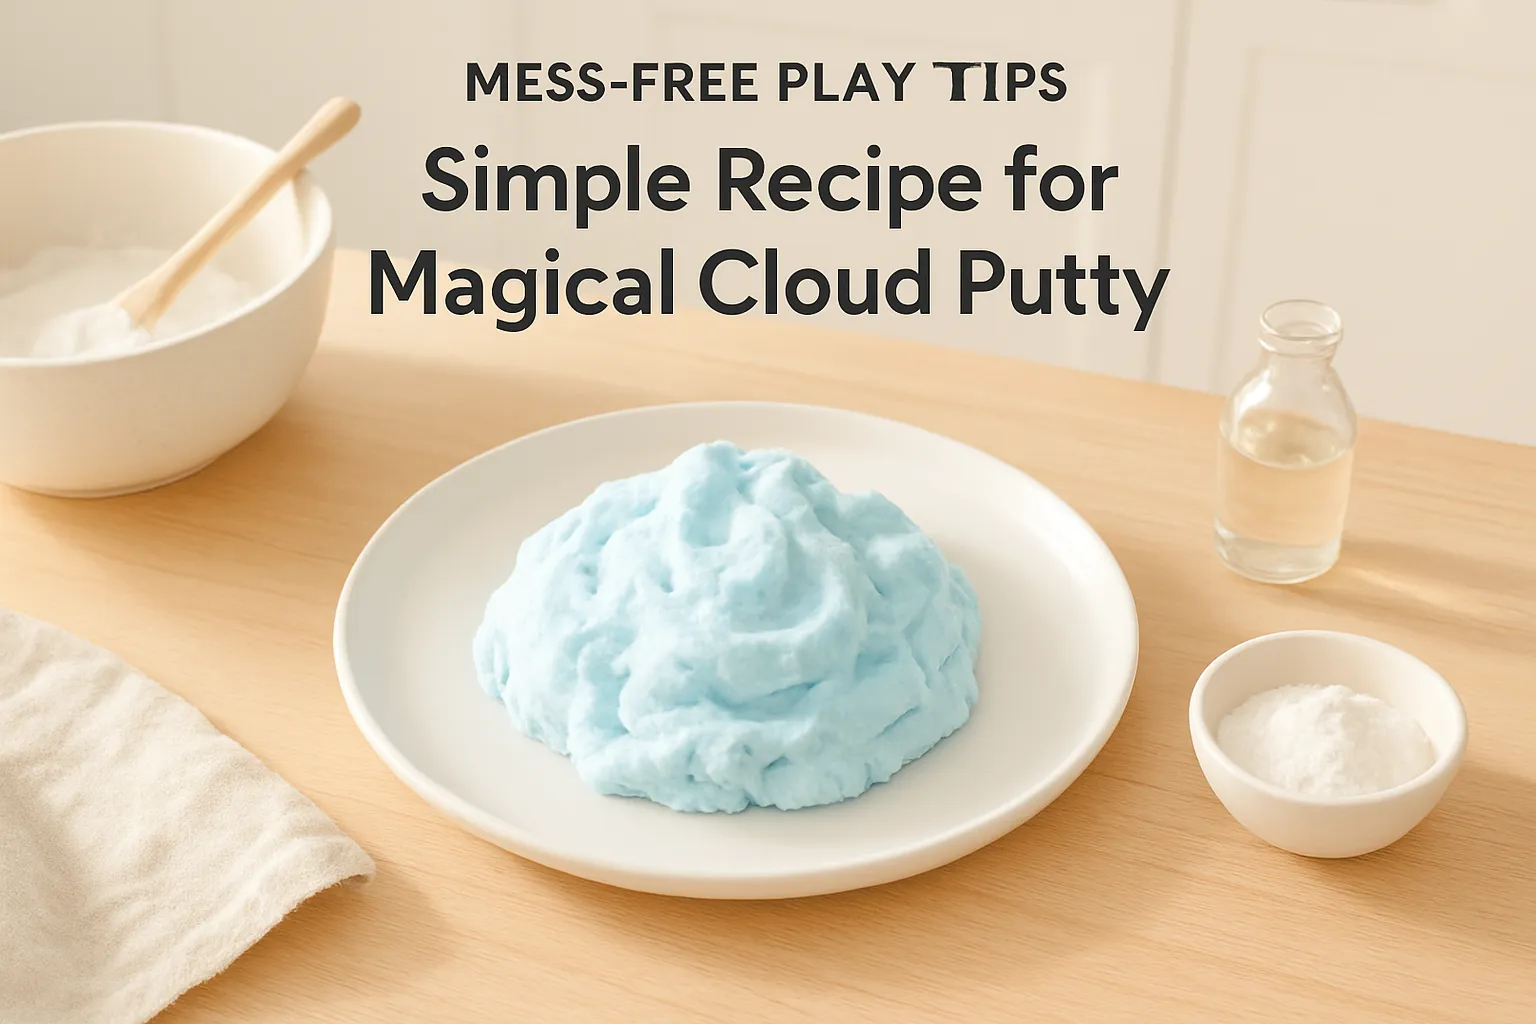
Mess Free Play Tips
Choose a small, defined play zone. A low table, highchair tray or an old baking tray lined with baking paper works wonders. The smaller the play space, the less chance of putty adventures migrating to the couch.
Portion it out. Give one tennis ball sized chunk per child and keep the rest sealed. Pop the extra in small muffin tin cups or snap containers so curious hands don’t tip everything out.
Use a washable mat or big tea towel under the play area. Silicone mats or placemats are brilliant because they wipe clean in seconds. If you want extra protection, lay down an old sheet or a shower curtain while they’re especially enthusiastic.
Dress for mess. Short sleeves, easy-to-wash tops and a play smock or an adult T-shirt will save laundry drama. Bare feet or socks that you don’t mind tossing later will cut down on putty footprints.
Make tools the star. Give cookie cutters, plastic spoons and small cups. Tools keep little hands focused and reduce the tendency to smear putty everywhere. A muffin tin is great for imaginative sorting play and limits spread.
Set a tidy rule. A quick phrase like “putty stays on the tray” and a cheerful demonstration helps. Toddlers love routine. Offer a two-minute tidy timer at the end of play and make it part of the fun.
Have wipes and a small bowl of water handy. Quick hand wipes or a damp cloth make immediate cleanups easy. Wipe surfaces straight after, then let them play again if needed rather than letting mess dry in place.
Keep a bin close. A small rubbish bowl for used wipes and scrap putty pieces avoids trips across the room that lead to accidental tracking.
Contain the wanderers. If you have a runner or a curious pet, close the door or use a playpen while the kids are playing. It only takes one dash to spread putty everywhere.
Pack away like a pro. Roll leftover putty into a ball, press it into an airtight container or ziplock, and pop it in the fridge or a cool cupboard if the recipe suggests. Wipe the tray, fold up the towel and you’re done.
Quick carpet fix: scrape up big chunks with a spatula, then blot with a damp cloth. Wash any fabric in the machine on a warm cycle. For stubborn bits, repeat the scrape and blot before washing.
Small changes make a big difference. A little pre-planning and a couple of minutes of tidy time after play keeps your home sane and the fun coming back tomorrow.
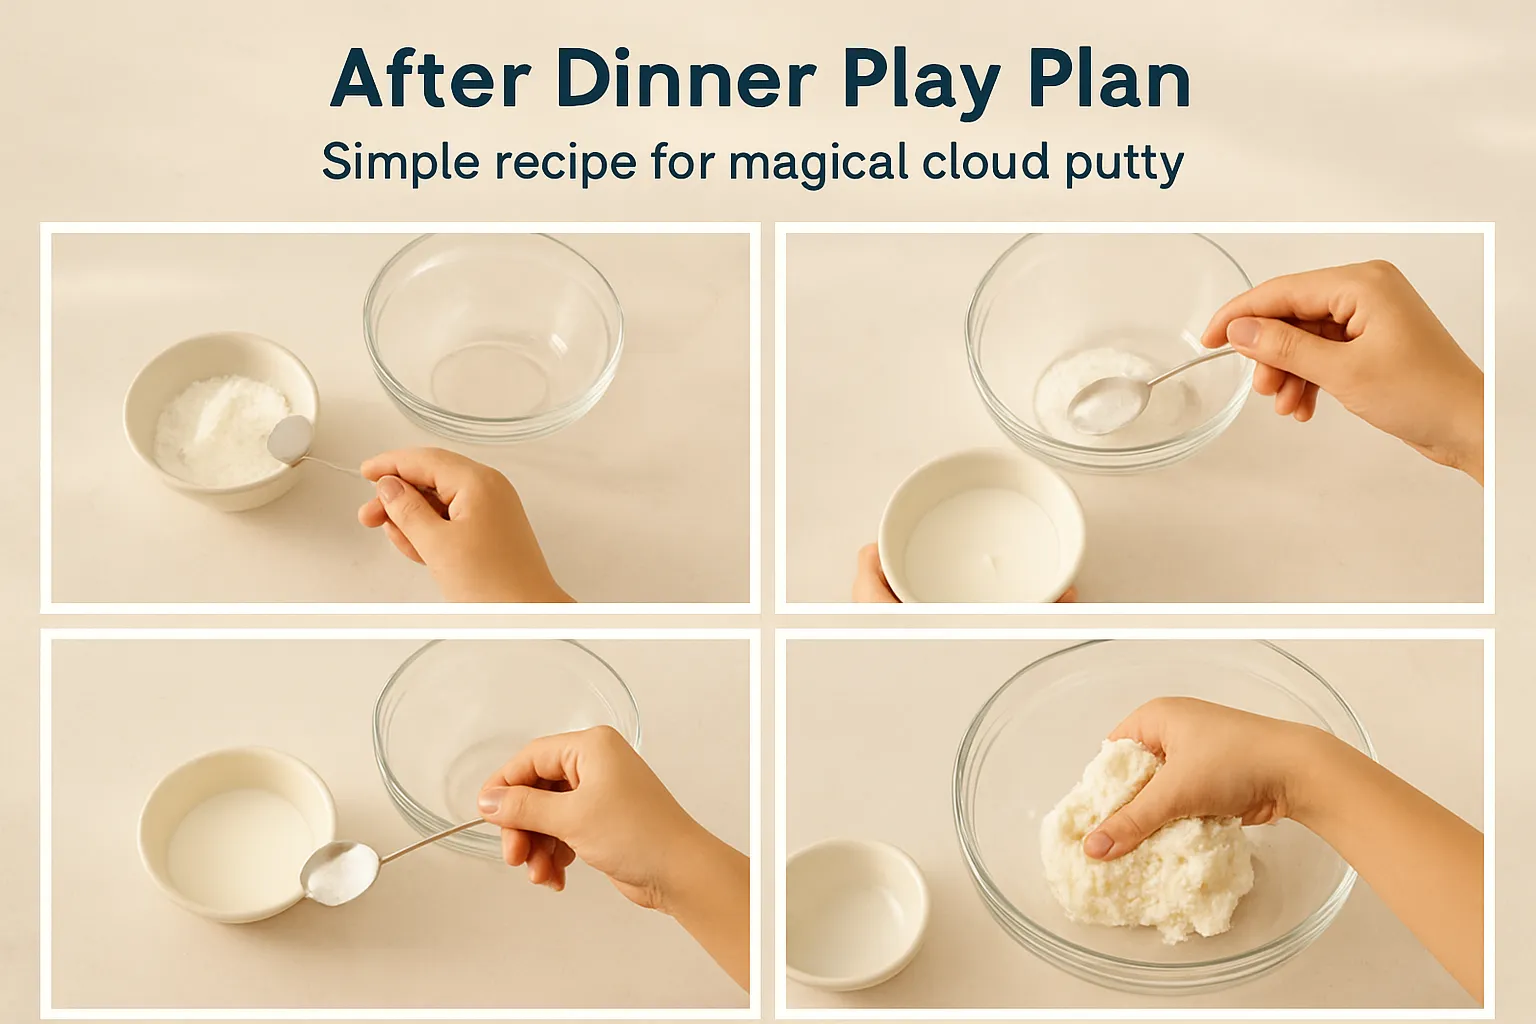
After dinner is a lovely little window for a calm, short play session that helps toddlers settle before bath and bed. Aim for 10 to 15 minutes - long enough to enjoy, short enough to keep bedtime on track.
Set up and vibe
- Put a small palm-sized portion into a shallow tray or silicone mat so it stays contained. Less is more at this time of night.
- Turn down the lights, switch on a soft lamp and play low mellow music or a quiet bedtime playlist. Keep voices low and slow.
- Have a damp cloth and a hand-wash station ready so the tidy-up transition is smooth.
Simple wind-down play ideas
- Squeeze-and-release breathing: show them how to squeeze the putty tight on an inhale, then slowly open on the exhale. Do it together three times.
- Gentle rolling: make long snakes and press them flat - calming repetitive motions.
- Tiny characters: roll little balls and use them as props for a short, quiet story or finger puppet chat.
- One-minute challenges: set a little timer for 60 seconds to make as many tiny shapes as possible, then count them together. Keeps things playful but contained.
Transitioning to bedtime
- Give a two-minute warning before tidy-up. Use positive phrasing like “two more minutes, then pop it away for bath time.”
- Turn tidying into a game: have them make a quick tunnel or nest and pop the putty back into its container. Praise the help.
- After the putty goes away, do hand-wash, teeth, and a short story while the lights stay low so the calm momentum continues.
If things get overexcited, stop the game and switch to a lap cuddle, a song, or a quiet story. The goal is a gentle, predictable routine that signals bedtime is next, and the small, contained session after dinner does exactly that. Give it a go for a few nights and tweak the timing to suit your child.

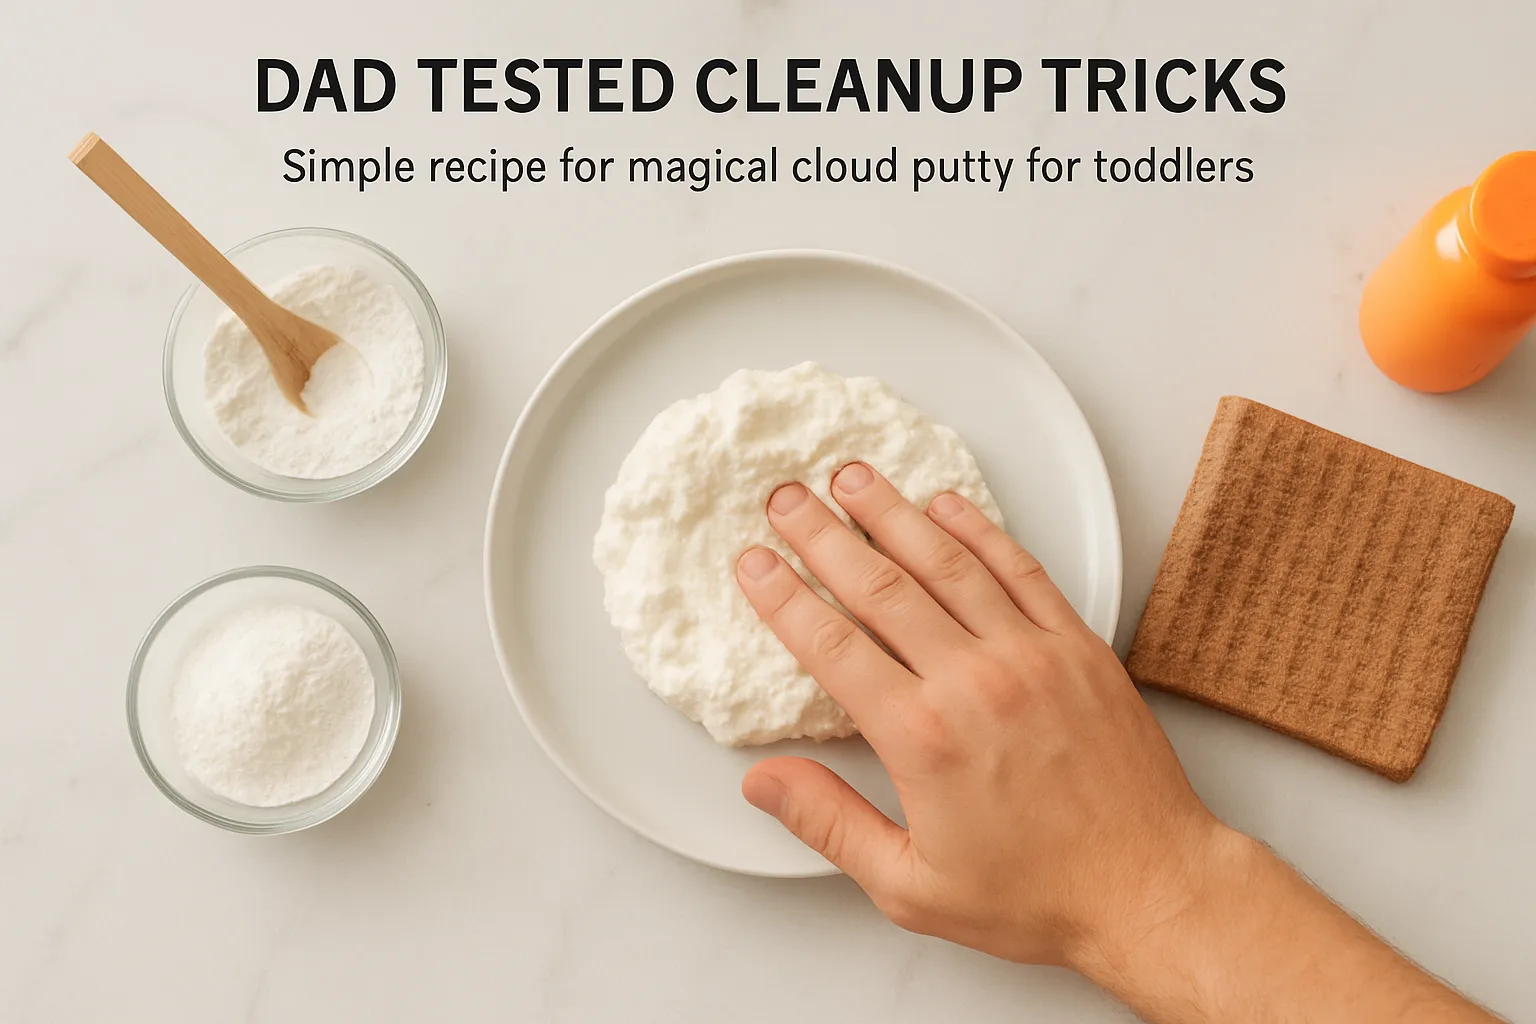
First thing: get the big bits off straight away. Scoop and stash them back in the tub or into a spare container so you only deal with the little bits.
Handy kit to keep nearby
- silicone spatula or old butter knife for scooping
- microfibre cloths or paper towels
- baby wipes for quick hands and face jobs
- bowl of warm soapy water
- spray bottle with half water, half white vinegar
- vacuum with hose or small handheld
- plastic bag for rubbish
Quick surface cleanup
- Scrape as much as you can into the jar or bin. The less left on the table or floor, the easier the rest is.
- Wipe straight away with a damp microfibre cloth and a squirt of dish soap. For sticky residue follow with the vinegar spray and wipe dry.
- If it’s on a high chair tray, pop the tray in the sink and soak a few minutes before washing. The putty slides right off after soaking.
Floors and carpet
- For hard floors: sweep or vacuum the dry bits first, then mop with warm soapy water. Make sure to remove any slippery residue so little feet don’t slip.
- For carpets: scoop off as much as possible. Blot the rest with warm soapy water, then dab with the vinegar mix. For dried bits, loosen with warm water, scrape gently with a plastic spatula, then vacuum.
Clothes and nappies
- Shake or scrape off excess. Rinse under cold water to remove the bulk.
- Rub a drop of dish soap or laundry liquid into the spot, let sit for 10 to 15 minutes, then pop in the wash on a normal cycle.
- For stubborn greasy bits, a short pre-soak in warm water with a bit of washing powder does wonders.
Hair and skin
- Baby wipes or warm soapy water usually do the trick for hands and faces.
- If it gets into hair, massage a little olive oil or conditioner through the area to loosen it, then shampoo as normal.
Tricks that actually work
- Freeze it: if the putty’s dried solid on a surface, a bag of ice will harden it so you can chip it away.
- Lint roller: brilliant for small dry bits on cushions or clothes.
- Trash tub: have a small plastic tub next to the play area for the first quick scrape. Saves time and stops drips.
Little habits that cut cleanup time
- Lay down an old towel or silicone mat under the play area.
- Keep a small caddy with the cleanup kit within arm’s reach.
- Make cleanup a two-minute job everyone helps with - kids love being the “putty boss” who returns it to the jar.
These are the things that actually save time and sanity after play. Keep the kit handy and you’ll be done before the tea goes cold.
Browse Cuisines
From the Blog
Cyber Dad’s Quick Roasts
Just a couple of cosy, no-fuss tricks I reach for when the weather makes everyone want to hibernate. Easy swaps and tiny rituals keep sips coming and a bit of fibre tucked in without a meltdown.
If you want a hot lunch that actually stays hot by pickup time, Steve has a handful of simple tricks that save the day. They’re quick, practical and have rescued many soggy pasta afternoons.


 Never miss a recipe from us, subscribe to our newsletter