
Warm packable breakfasts for March: 8 kindy-ready options your toddler will eat

A quick little intro: these porridge jars are my top pick for cool March mornings because they can be made ahead, kept warm, and customised so your toddler actually eats them.
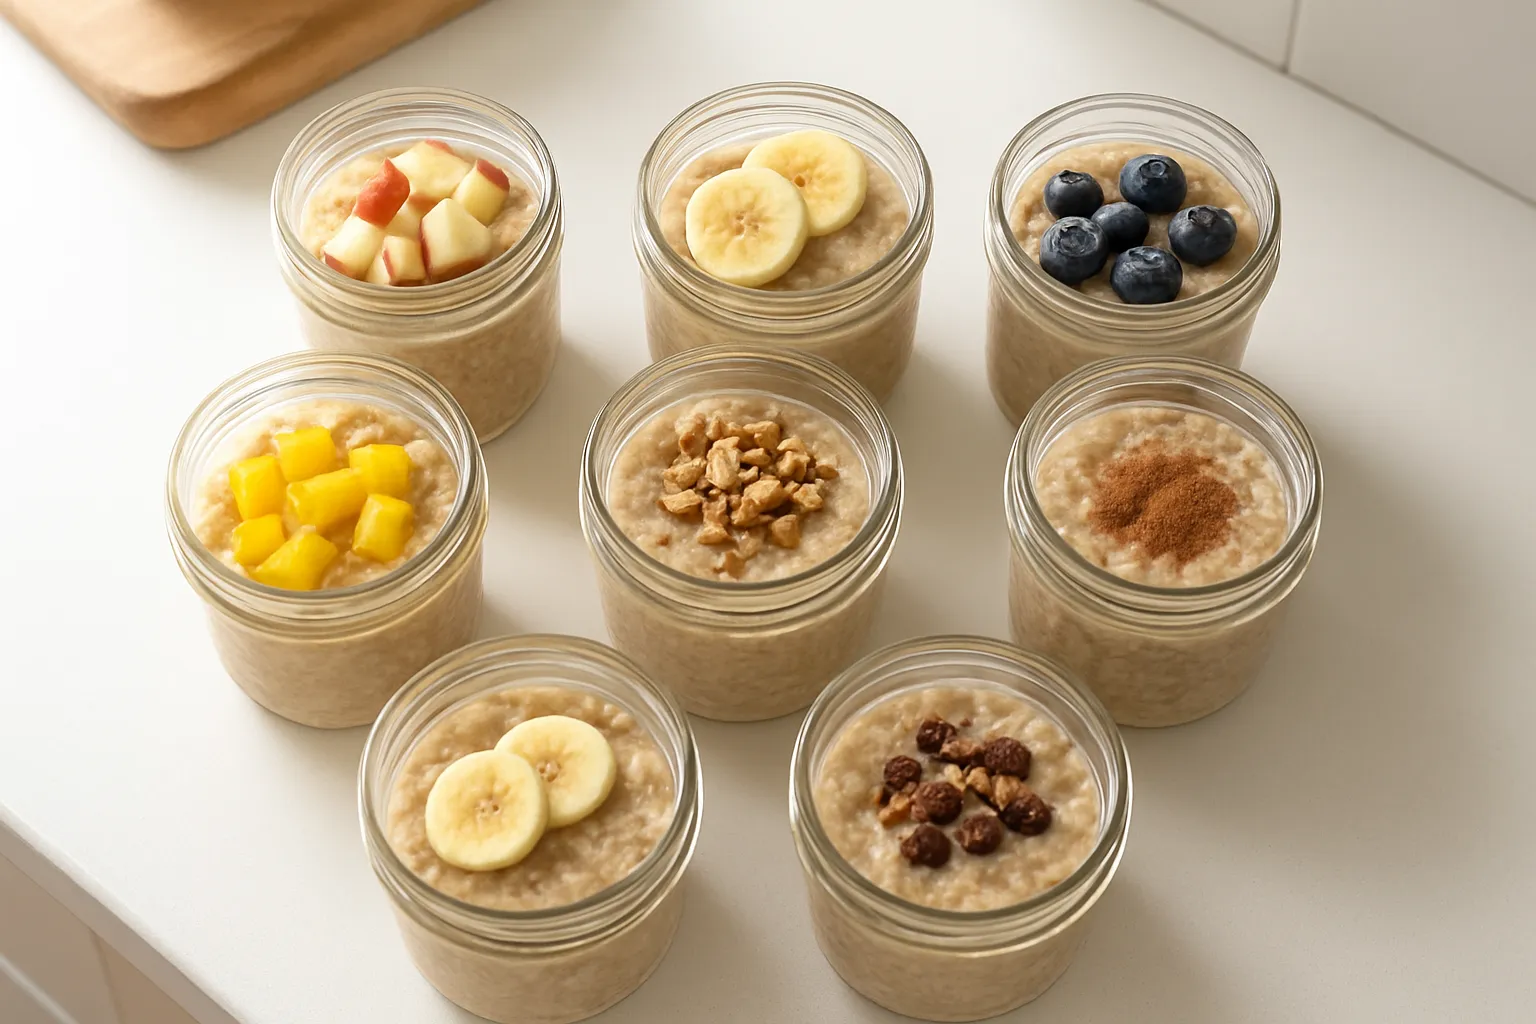
Baked porridge jars (make-ahead, toddler-sized) Makes 6 small jars (about 150-200 g cooked per jar)
Ingredients
- 2 cups rolled oats (180 g)
- 1/3 cup chia seeds or ground flax (optional for extra goodness)
- 2 tsp baking powder
- 1 tsp cinnamon
- 1/4 tsp salt
- 2 cups milk (500 ml) or unsweetened plant milk
- 1 cup applesauce or mashed banana (adds sweetness and moisture)
- 2 large eggs, lightly beaten
- 2 tbsp melted butter or neutral oil
- 1 tsp vanilla extract
Method
- Preheat oven to 180°C and grease six 250-300 ml jars or ramekins.
- Mix oats, chia or flax if using, baking powder, cinnamon and salt in a bowl.
- In another bowl whisk milk, applesauce or mashed banana, eggs, melted butter and vanilla.
- Pour wet into dry and stir until combined. Divide between jars.
- Bake for 25-30 minutes until puffed and set. Let cool, then seal with lids and refrigerate.
Why this works for kindy
- Baked jars keep their shape and are easy to scoop from a thermos or chilled and warmed.
- They’re dense enough to be filling but soft for little mouths.
- Made in jars, they stack neatly in the fridge and are easy to grab in the morning.
Flavour ideas (mix into the batter before baking)
- Apple cinnamon: fold in 1 grated apple and 1 tsp extra cinnamon.
- Banana blueberry: swap applesauce for mashed banana and fold in 1/2 cup fresh or frozen blueberries.
- Pumpkin spice: replace applesauce with 1 cup pumpkin purée and add 1 tsp mixed spice.
- Savoury option: omit sweet things, add grated carrot, finely chopped spinach and a mild cheese.
Packing and reheating tips
- Thermos method: preheat the thermos by filling it with boiling water for a couple of minutes, empty it, then fill with freshly warmed porridge jar contents just before leaving. Test temperature first. Most good thermoses will keep it warm long enough for kindy pick-up.
- If the kindy can microwave lunches, reheat a chilled jar for 45-60 seconds and check temperature.
- Keep crunchy toppings separate: raisins, chopped dried fruit, toasted seeds or cereal in a small container so they stay crunchy until eating.
- Portion guide: one jar per toddler is usually perfect for breakfast. If your child eats more, pack a fruit or yoghurt side.
Make-ahead and storage
- Fridge: sealed jars keep 3-4 days.
- Freezer: baked jars freeze well up to 1 month. Thaw overnight in the fridge and reheat or transfer to a thermos warm-up.
- If using honey, only for over 12 months old. For nut-free kindies, avoid nut butters in toppings and use sunflower seed butter or mashed banana instead.
Little tricks that help them eat
- Mash a banana into the batter for natural sweetness and creamy texture.
- Stir a spoonful of yoghurt into the jar just before closing for extra tang and protein.
- Label lids with flavour and date so carers know what’s inside.
These jars are a real time-saver and great to rotate through the week so mornings stay calm and warm.
My egg and veg muffins
These are a weeknight lifesaver. Make a big batch on Sunday and the kids have warm, protein-packed bites for kindy that hold up well in a lunchbox.
Simple egg and veg muffins (makes 12 standard or 24 mini) Ingredients
- 8 large eggs (or 4 eggs + 200 ml milk for a fluffier set)
- 1 cup grated carrot (about 1 medium)
- 1 cup grated zucchini, excess moisture squeezed out
- 1/2 cup finely chopped red capsicum or corn kernels
- 1/2 cup chopped spinach or kale, very finely chopped
- 3/4 cup grated cheddar or tasty cheese, or dairy-free alternative
- 1/2 tsp baking powder (helps puffing if you use milk)
- 1/2 tsp mild smoked paprika or sweet paprika (optional)
- Pinch of salt and a good grind of pepper
- 1 tbsp olive oil for greasing the tin
Method
- Preheat oven to 180 C and grease a 12-hole muffin tin, or use silicone cups for easy removal. For mini muffins, use a 24-hole pan and bake a bit less.
- Whisk eggs and milk (if using) in a large bowl until smooth. Stir in cheese, baking powder, paprika, salt and pepper.
- Add the grated carrot, zucchini, capsicum, spinach and mix well so veg is evenly distributed.
- Spoon mixture into muffin holes. For standard muffins fill about 3/4 full. For minis fill just under the top.
- Bake 18 to 22 minutes for standard muffins, or 10 to 14 minutes for mini muffins, until set and lightly golden. A toothpick should come out mostly clean.
- Let cool in the tin for 5 minutes then transfer to a rack to finish cooling.
Portions and serving
- Toddlers often eat half a standard muffin or 2 to 3 mini muffins, depending on appetite. Freeze extras in a single layer then transfer to a bag.
- Keep muffins warm in a thermos for short trips, or pack at room temperature in an insulated lunchbox with a cold pack if they will be eaten cold.
Make-ahead and freezing
- Fridge: 3 days in an airtight container.
- Freezer: up to 3 months. Cool completely, freeze on a tray then bag them so they don’t stick together.
- To reheat from frozen: microwave one standard muffin for 50 to 70 seconds, or a mini for 30 to 40 seconds. Alternatively, thaw in the fridge overnight and heat at 160 C in the oven for 8 to 10 minutes to crisp up.
Packing tips for kindy
- Cool fully before packing to avoid sogginess from steam.
- If the centre warms up during the day, pack in an insulated container and send a small cold pack to go with the rest of the lunchbox. Confirm with the centre whether they will reheat food and how long they can keep it warm.
- Label bags with date and contents if you send frozen muffins for staff to thaw.
Easy variations
- Ham and cheese: swap half the veg for finely chopped ham.
- Indian-spiced: add 1/2 tsp garam masala and some chopped coriander.
- Dairy-free: swap cheese for nutritional yeast or leave it out, use plant milk.
- Gluten-free boost: add 1/4 cup cooked quinoa or mashed sweet potato for extra texture and slow-release energy.
Egg-free option
- Chickpea flour muffins: mix 1 cup chickpea flour with 1 cup water and 1 tbsp oil, season and fold in the same veg mix. Bake at 180 C for 20 to 25 minutes for standard muffins. They keep and freeze the same way.
Little tricks that help
- Grate veg finely so it blends into the eggs and little teeth don’t struggle.
- Use silicone muffin cups or spray the tin well so they pop out cleanly.
- If you want a softer texture, add a dollop of ricotta or yoghurt to the egg mix.
These are kid-friendly, pack well and are easy to change up so your little one doesn’t get bored.


If the egg and veg muffins were a winner, these sweet potato hash cups give you the same make-ahead convenience with a bit more crunch and sweetness toddlers love.
Ingredients (makes about 12 small cups)
- 1 large sweet potato, about 500 g, peeled and grated
- 1 small carrot, grated (optional)
- 1/2 small onion, very finely chopped or grated
- 1 egg (or 1 flax egg for egg-free: 1 tbsp ground flax + 3 tbsp water, set 5 minutes)
- 1/2 cup grated mild cheese or dairy-free alternative (optional)
- 2 tbsp plain flour or oat flour (helps bind)
- 1/4 tsp salt and a pinch of pepper (keep it mild)
- 1 tsp mild smoked paprika or ground cumin (optional for flavour)
- a little oil for the tin
Method
- Preheat oven to 200°C. Lightly grease a 12-hole muffin tin or use silicone liners.
- Squeeze excess moisture from the grated sweet potato in a clean tea towel or paper towel. This stops the cups going soggy.
- Combine the grated sweet potato, carrot, onion, egg (or flax egg), cheese, flour and seasonings in a bowl. Mix until everything is evenly coated.
- Press tablespoons of the mixture firmly into each muffin well, building up the sides so you form a little cup. Try to keep the base slightly thinner than the edges so they crisp up.
- Bake 18 to 22 minutes until golden and the edges are crisp. If you want them extra crunchy, turn the oven down to 180°C and bake a further 5 minutes.
- Let cool in the tin for 5 minutes, then transfer to a rack to cool completely. They will firm up as they cool.
Serving and kindy packing
- These are great warm or cold. Let them cool fully before packing in a lunchbox so they don’t sweat and make the sandwich or fruit soggy.
- Fill them with a tiny scoop of scrambled egg, cottage cheese or a dab of plain yoghurt just before serving for a protein boost.
- For kindy, two small cups plus a piece of fruit is a solid breakfast portion for most toddlers. Adjust for your little one’s appetite.
Make-ahead and freezing
- Store in the fridge for up to 4 days in an airtight container with a paper towel to absorb moisture.
- Freeze single layers on a tray until solid, then pop into a freezer bag for up to 2 months. Thaw overnight in the fridge or reheat from frozen for 1 to 2 minutes in the microwave until steaming, or 10 minutes in a 160°C oven.
Variations and swaps
- Add finely chopped spinach, grated zucchini (squeeze moisture out), or small pieces of cooked bacon or ham for extra flavour.
- Make them dairy-free by skipping the cheese or using a dairy-free grated alternative.
- If your kindy needs egg-free options, the flax egg works well and keeps the texture pleasantly soft.
Toddler tips
- Cut larger cups into halves for tiny hands. Children often prefer the crunchy edges, so leave those in the centre of the tin if you share with adults.
- If your little one is suspicious of new textures, serve with a familiar dip like mild tomato paste or mashed avocado. That can make all the difference at kindy drop-off.

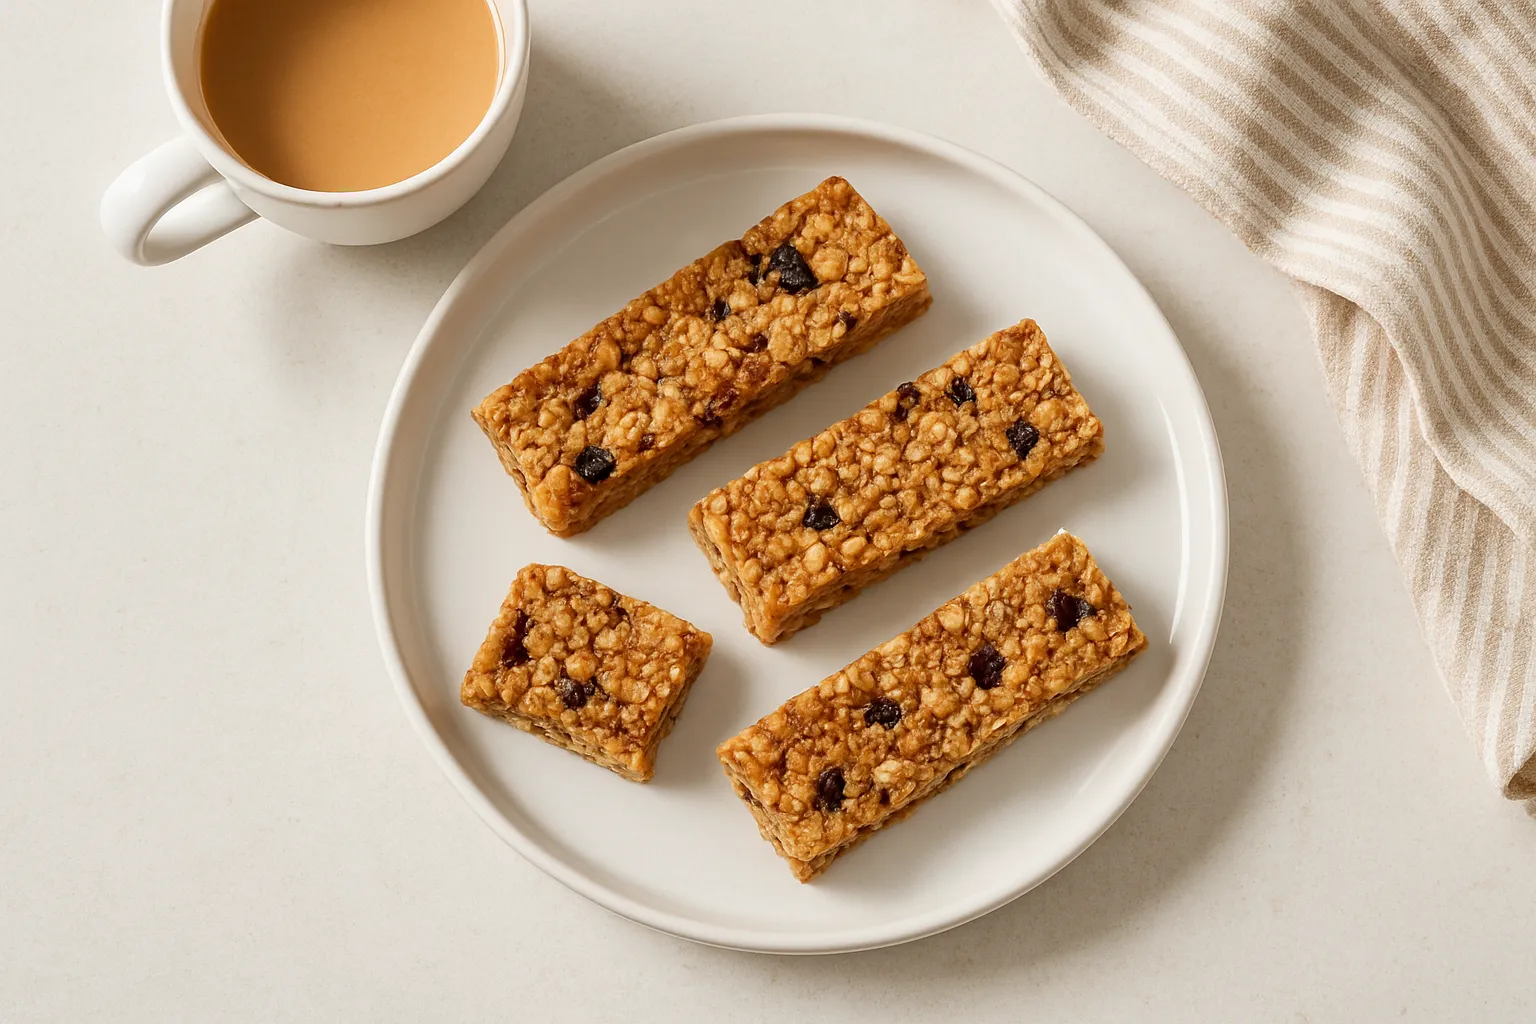
These are the ones I pack when I want something easy, sturdy and school-safe. Chewy, a little gooey and peanut-free, they slice into kid-friendly squares and survive a kindy bag without turning to dust.
Ingredients (makes about 12 bars)
- 2 cups rolled oats (not instant)
- 1/2 cup sunflower seed butter (or soy butter if required)
- 1/3 cup maple syrup or golden syrup (avoid honey for under-1s)
- 1/4 cup coconut oil or melted butter
- 1/3 cup puffed rice or dry cereal for crunch
- 1/4 cup finely chopped dried fruit (sultanas, apricots) or 2 tbsp chia seeds
- 2 tbsp ground flaxseed (helps bind)
- 1 tsp vanilla extract, pinch of cinnamon, pinch of salt
Method
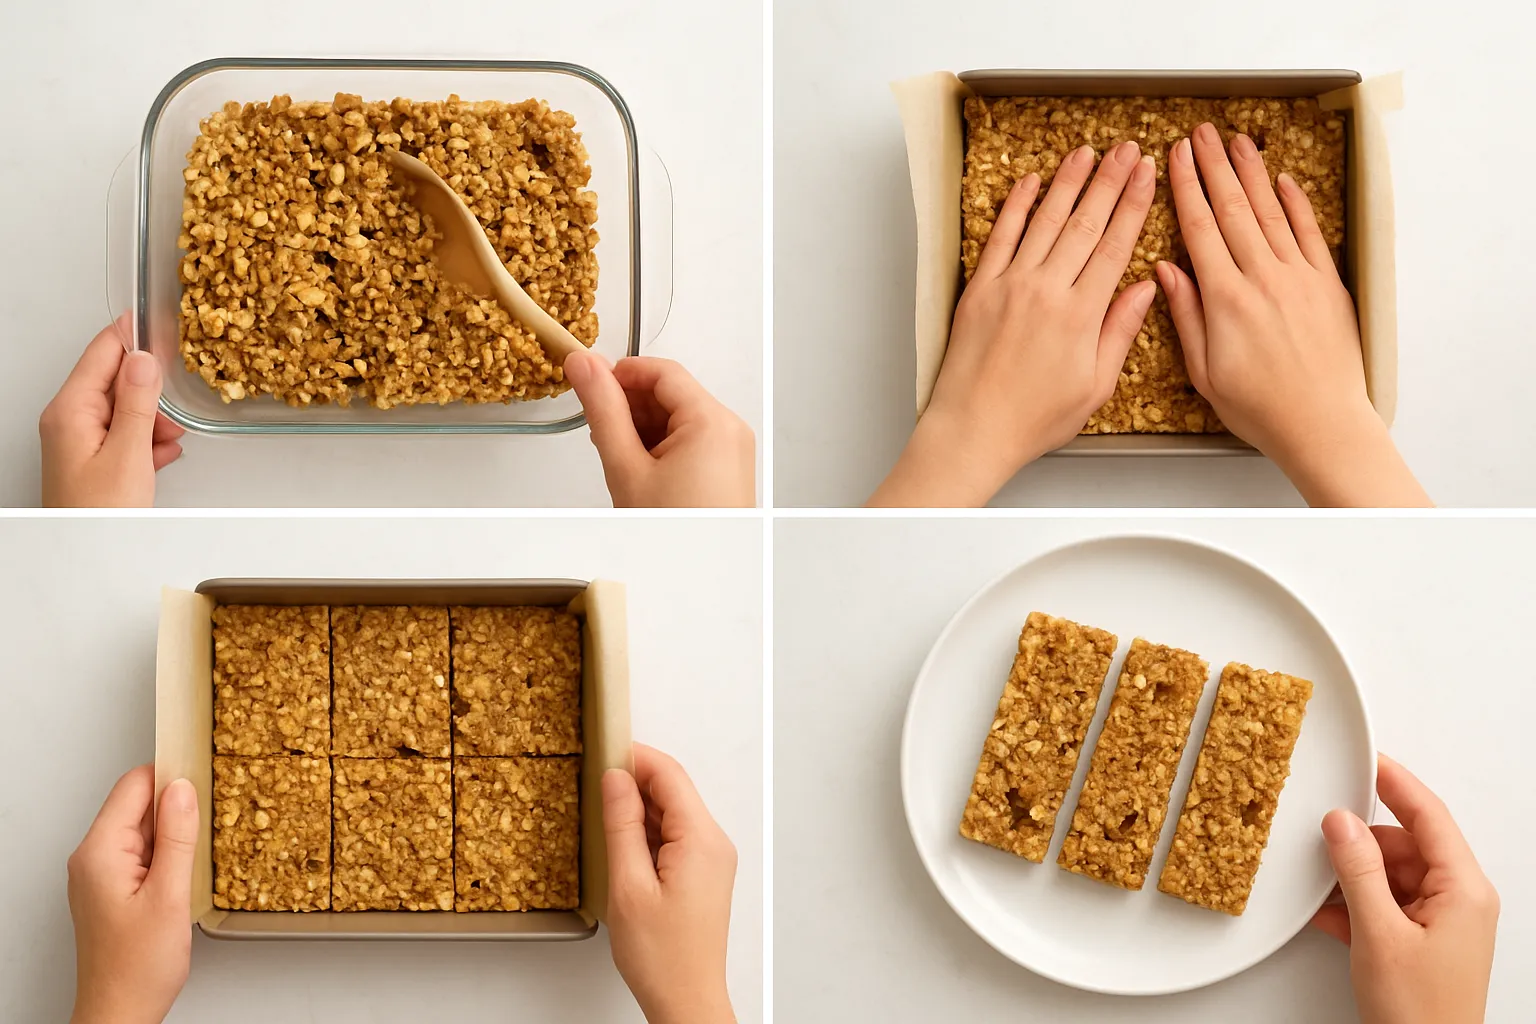
- Line a 20x20cm (8-inch) square tin with baking paper.
- Warm the sunflower seed butter, maple syrup and coconut oil in a small saucepan over low heat, stirring until smooth. Remove from heat and stir in vanilla.
- In a bowl, mix oats, puffed rice, ground flax, dried fruit or chia, cinnamon and salt. Pour the wet mix over the dry ingredients and stir until everything is evenly coated.
- Tip into the tin and press down very firmly with the back of a spoon or a piece of baking paper to compact. The firmer you press, the less crumbly the bars will be. 5A. No-bake option: Chill in the fridge for at least 2 hours, then lift out and cut into bars. 5B. Baked option (firmer bars): Bake at 160°C (320°F) for 15-18 minutes until slightly golden, then cool completely before cutting.
Toddler-friendly tweaks and safety
- Skip whole nuts or large seeds to avoid choking. If you want extra seeds, grind them or use seed butter.
- For younger toddlers, soften dried fruit by chopping very finely or soaking briefly in warm water.
- If your kindy has a sesame ban, do not use tahini or sesame-containing seed mixes. Sunflower seed butter is usually a safe go-to.
- If your child has an egg allergy, these are egg-free as written.
Storage and packing
- Keep bars in an airtight container in the fridge for up to 1 week, or freeze cut bars for up to 2 months. Thaw overnight in the fridge or at room temperature for 30-60 minutes before packing.
- Wrap individually in baking paper or reusable wraps. Pop an ice pack in the lunchbox if it will be out for several hours, especially on hot days.
- Label each bar if required by kindy, listing sunflower seeds as an ingredient so the centre is aware of the swap from peanuts.
Variations to try
- Chocolate lover: stir through 2 tbsp cocoa powder and a handful of dark chocolate chips (press them into the top after baking so they don’t melt completely).
- Apple-cinnamon: replace dried fruit with 1/2 cup grated apple squeezed dry and add extra cinnamon.
- Boost the calcium: add 2 tbsp powdered milk into the dry mix if dairy is fine.
These keep well, are easy to halve or cube for smaller mouths, and are handy for busy mornings when you need something quick that won’t get banned at kindy.
Last up, spicy baked oats. These are a favourite when you want something warm, a little bit different and still toddler-friendly. Think soft, cheesy oat cups with a gentle smokiness rather than full-on heat.
Ingredients (makes about 6 toddler-sized cups)
- 1 cup rolled oats (about 90 g)
- 1 tsp baking powder
- 1/2 tsp ground cumin
- 1/2 tsp smoked paprika (or sweet paprika if you prefer no smokiness)
- pinch of chilli flakes or 1/8 tsp cayenne for a very mild warmth, optional
- 1 small carrot, grated (or 1/2 cup grated zucchini, squeezed)
- 1/3 cup corn kernels (fresh or frozen)
- 1/4 red capsicum, finely diced
- 1/2 cup grated cheddar (or dairy-free cheese)
- 2 eggs
- 3/4 cup milk (180 ml; dairy or plant milk)
- 1 tbsp olive oil or melted butter
- pinch of salt (keep it small for little ones)
Method
- Preheat oven to 180°C fan or 200°C conventional. Grease a 6-hole muffin tin or use silicone cases.
- Mix the oats, baking powder, cumin, paprika and salt in a bowl.
- Stir through the grated veg, corn and cheese.
- Whisk eggs, milk and oil together, then pour into the dry mix. Stir until combined. If the mix seems too thick, add a splash more milk.
- Spoon into the muffin tin, filling each about three quarters full.
- Bake for 18 to 22 minutes until set and lightly golden on top. Cool for 5 minutes in the tin, then transfer to a rack.
Spice tips for toddlers
- Keep it very mild at first. Use smoked paprika for flavour rather than heat, and either omit chilli entirely or add the tiniest pinch. You can always add a little more to adult portions.
- If your child is new to savoury oats, skip chilli for the first couple of batches and sneak in the flavour with cumin and cheese.
Pack, reheat and store
- To send warm: pop an oat cup into a pre-warmed insulated food jar (fill the jar with boiling water for a few minutes, empty, then add the hot oat cup). This keeps it warm for kinder drop-off.
- If the centre is still warm but not piping hot, most toddlers are fine with room-temperature breakfasts. Pair with a cool yoghurt pot or fruit.
- Fridge: 3 days. Freezer: freeze cooled cups on a tray then transfer to a bag for up to 2 months.
- Reheat from frozen in the microwave for 60 to 90 seconds or in a 160°C oven for 15 to 20 minutes.
Variations and add-ins
- Swap veg: grated sweet potato, spinach or peas work well.
- Add protein: small cubes of cooked chicken or mashed beans.
- Dairy-free: use plant milk and dairy-free cheese, or add a dollop of hummus when serving.
Serving ideas
- Cool slightly and pair with plain yoghurt, avocado smash or a little tomato sauce for dipping. Cut into wedges for little hands.

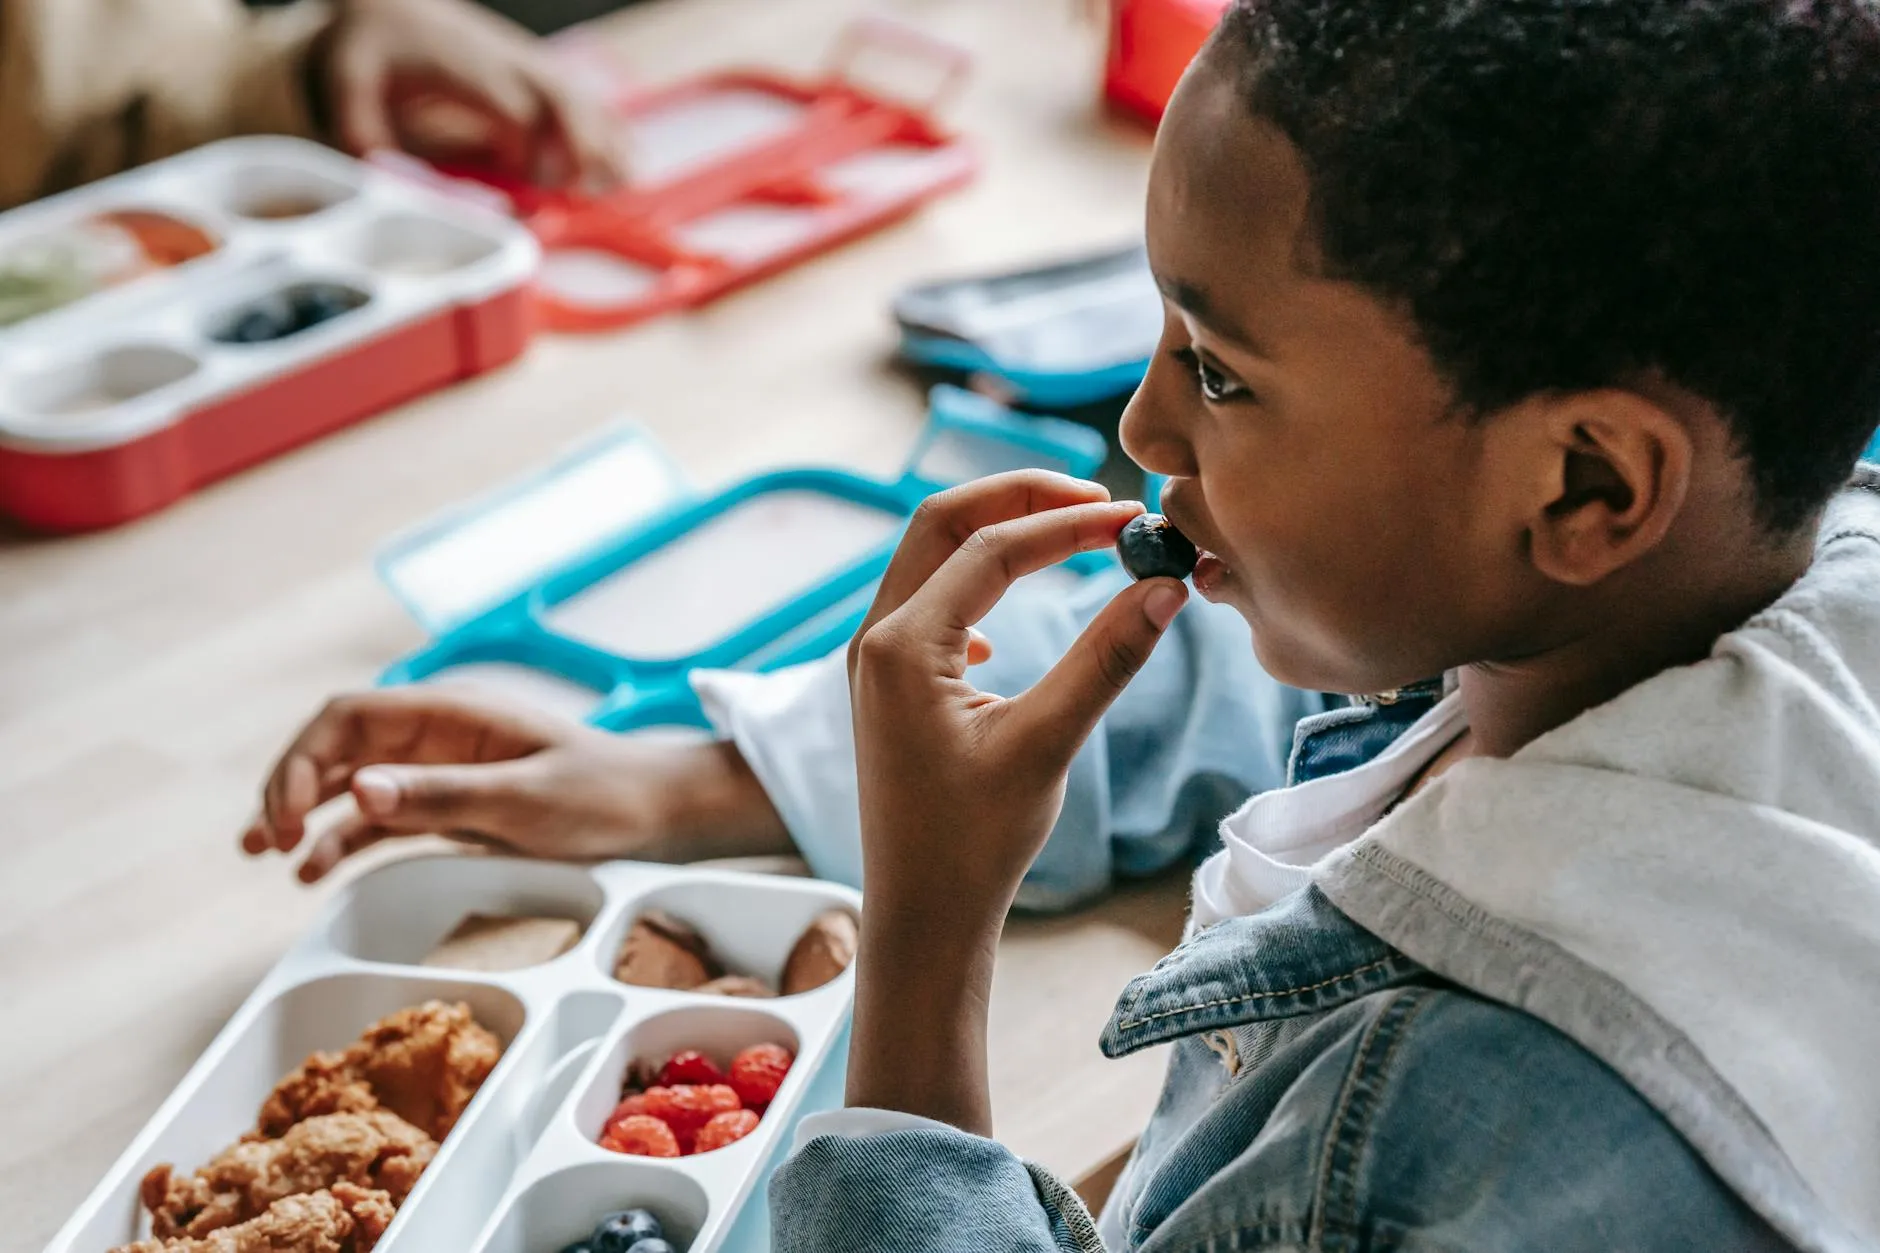
Photo credit: Pexels
Browse Cuisines
From the Blog
Cyber Dad’s Quick Roasts
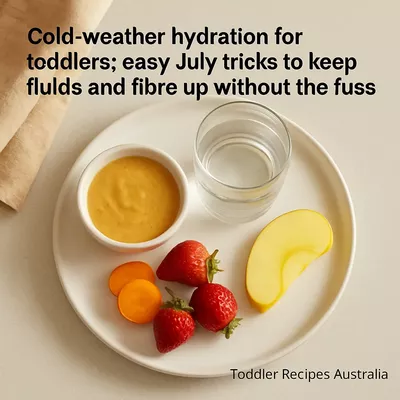
Just a couple of cosy, no-fuss tricks I reach for when the weather makes everyone want to hibernate. Easy swaps and tiny rituals keep sips coming and a bit of fibre tucked in without a meltdown.
If you want a hot lunch that actually stays hot by pickup time, Steve has a handful of simple tricks that save the day. They’re quick, practical and have rescued many soggy pasta afternoons.


 Never miss a recipe from us, subscribe to our newsletter