
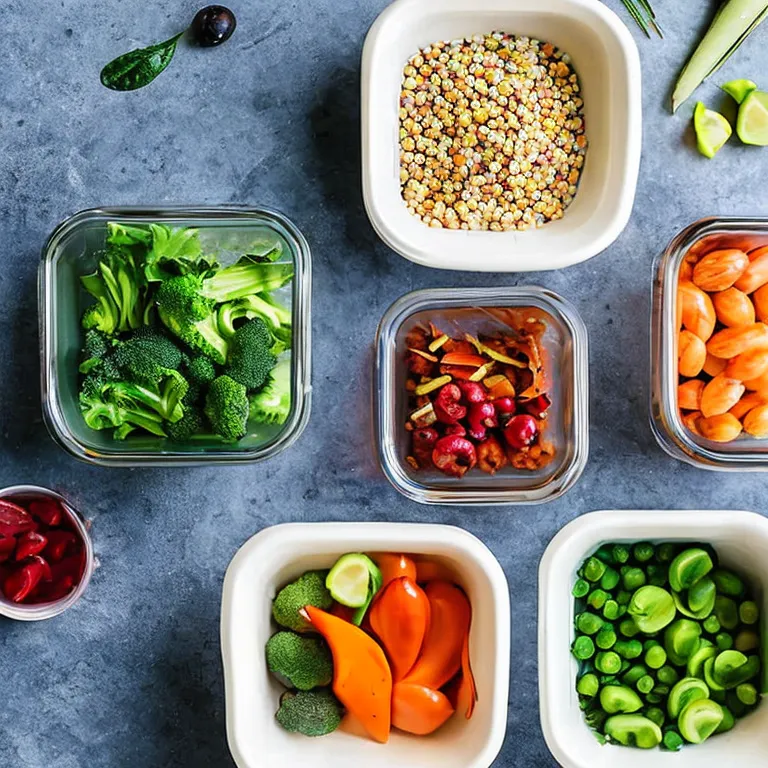
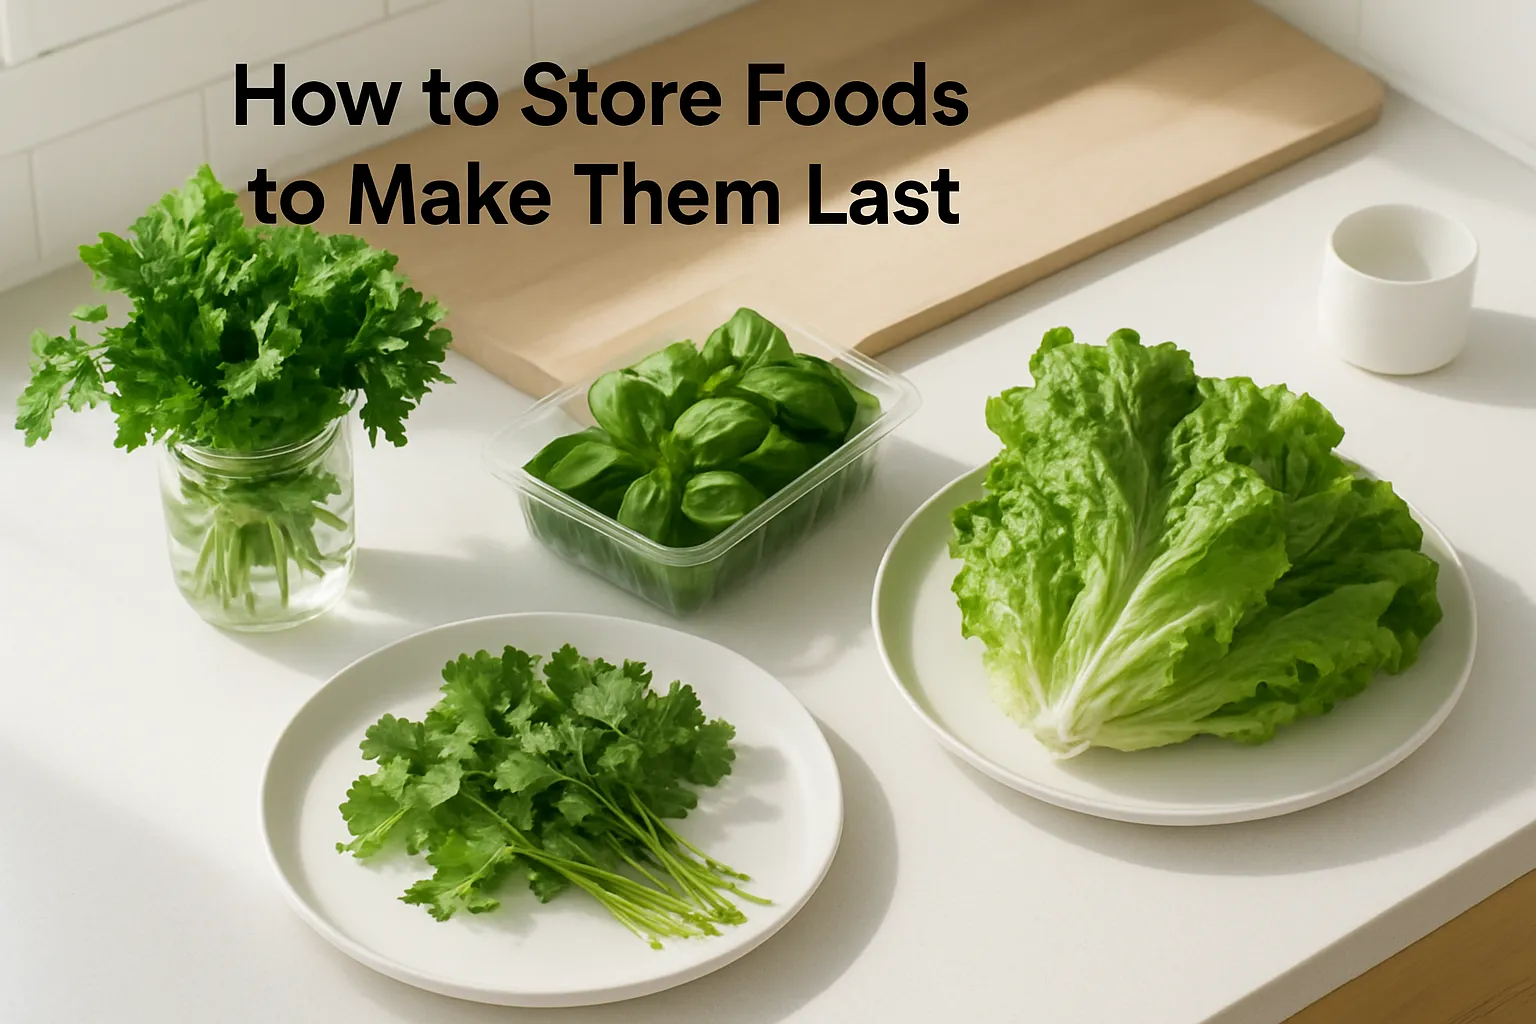
How to store foods to make them last
A tidy pantry is like a tiny kitchen assistant: it saves time, cuts stress and helps meal-making feel a little less chaotic. Here are practical layout ideas that actually work for busy families.
-
Zone it by use, not just by food type. Put breakfast items together (cereal, oats, spreads), breakfast bowls and spoons nearby, a lunch-making shelf with wraps, bread, spreads and sandwich fillers close to the bench, and a dinner station with pasta, rice, sauces and canned goods near the stove. Grouping by meal cuts down on running around.
-
Eye-level for the everyday. Keep the things you use most often at eye level so you can grab them without bending or lifting. Reserve lower shelves for heavy stuff like bulk flour, bottled water and large cereal boxes, and the top shelf for rarely used items and party extras.
-
Create a kids’ snack station low down. Use shallow bins with pre-portioned snacks in clear containers or zip bags so little hands can help themselves safely. Stick to a few healthy choices and rotate them weekly to keep novelty.
-
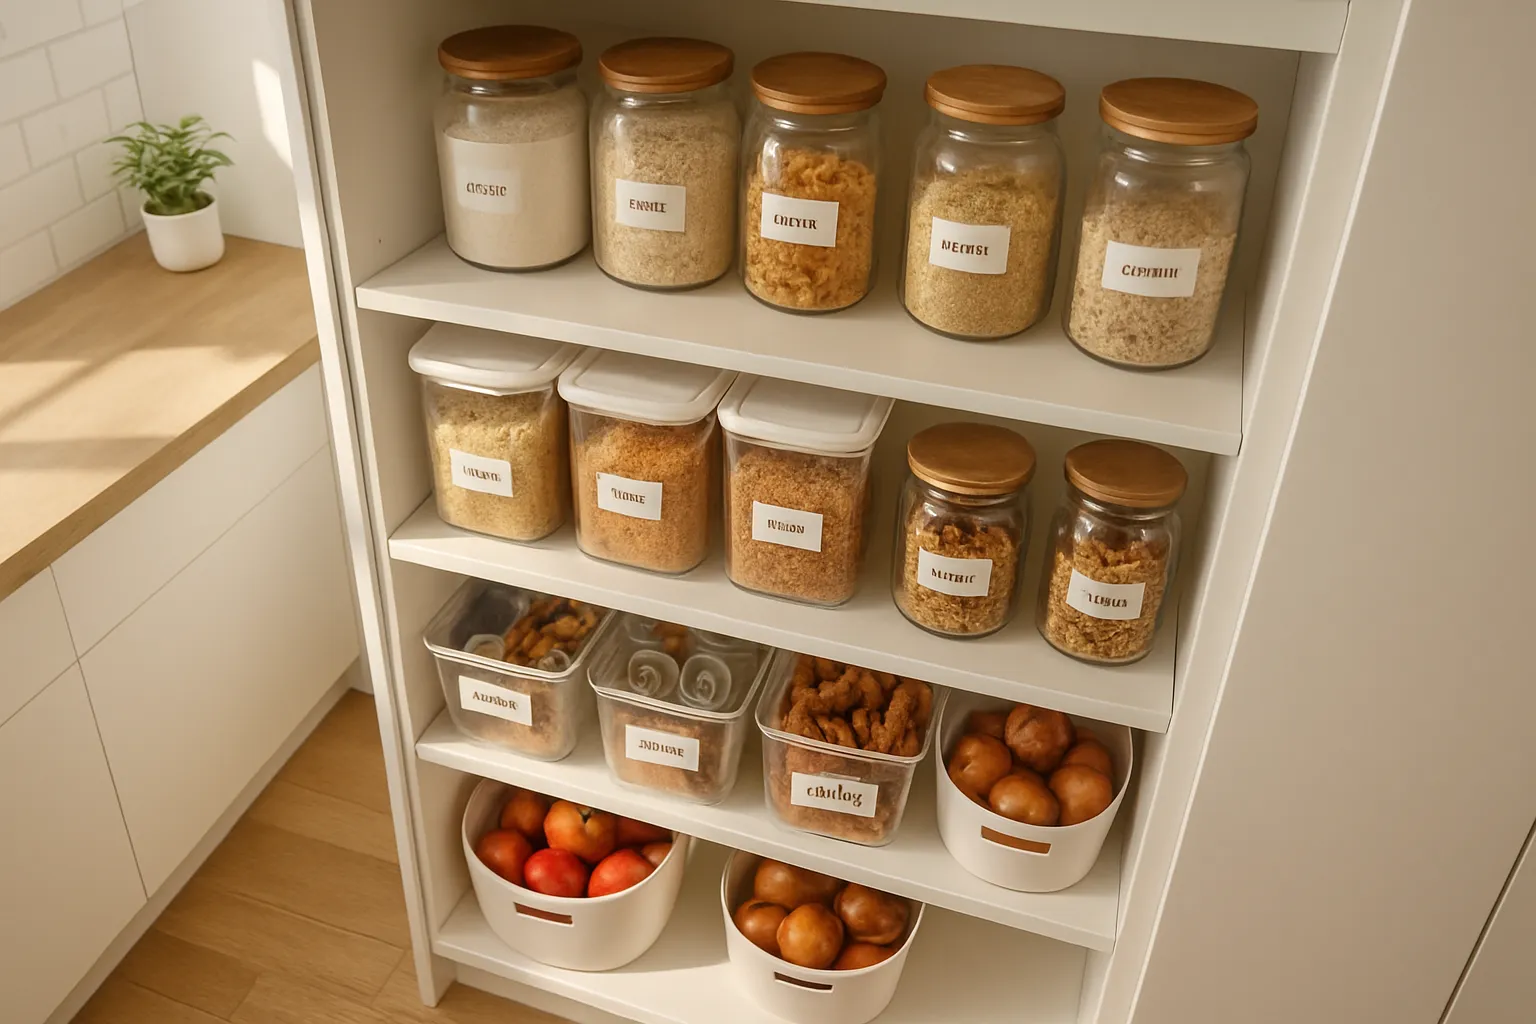
Use clear, stackable containers. Decant flours, rice, oats and snacks into airtight jars or tubs so you can see quantities instantly. Label with contents and the date opened. It looks neater and stops a half-used bag getting stale at the back of the shelf.
-
Baskets and small bins for loose bits. Keep packets, breakfast bars, seasoning sachets and sauce pouches in labelled baskets so they don’t become a single chaotic pile. Bins are great for cereal bars, lunchbox treats and baking bits.
-
Lazy Susans and shelf risers equal less faffing. Turntables make oils, vinegars and small bottles easy to reach. Risers double shelf space and let you see tins and jars without moving everything.
-
FIFO and the “use soon” basket. When you shop, put new items behind the old ones so older stock gets used first. Have a small front-facing basket for anything that needs to be eaten this week.
-
Dedicated meal-prep kits. For nights when you need dinner sorted fast, keep a box with pasta, a jar of sauce, a can of tomatoes and dried herbs together. Throw in a printed recipe card or family favourite notes so whoever is on dinner duty can get it done quickly.
-
Keep safety in mind. Store glass jars and heavy bottles out of reach of toddlers. Lock away sharp or toxic items, or place them high out of reach.
-
Quick maintenance habit. Spend five minutes on Sunday putting things back where they belong, checking expiry dates and jotting missing items on a notepad on the pantry door. A tiny routine prevents the big mess later.
These small changes make mornings and meal times smoother, and they’re easy to keep up even when life is full-on.
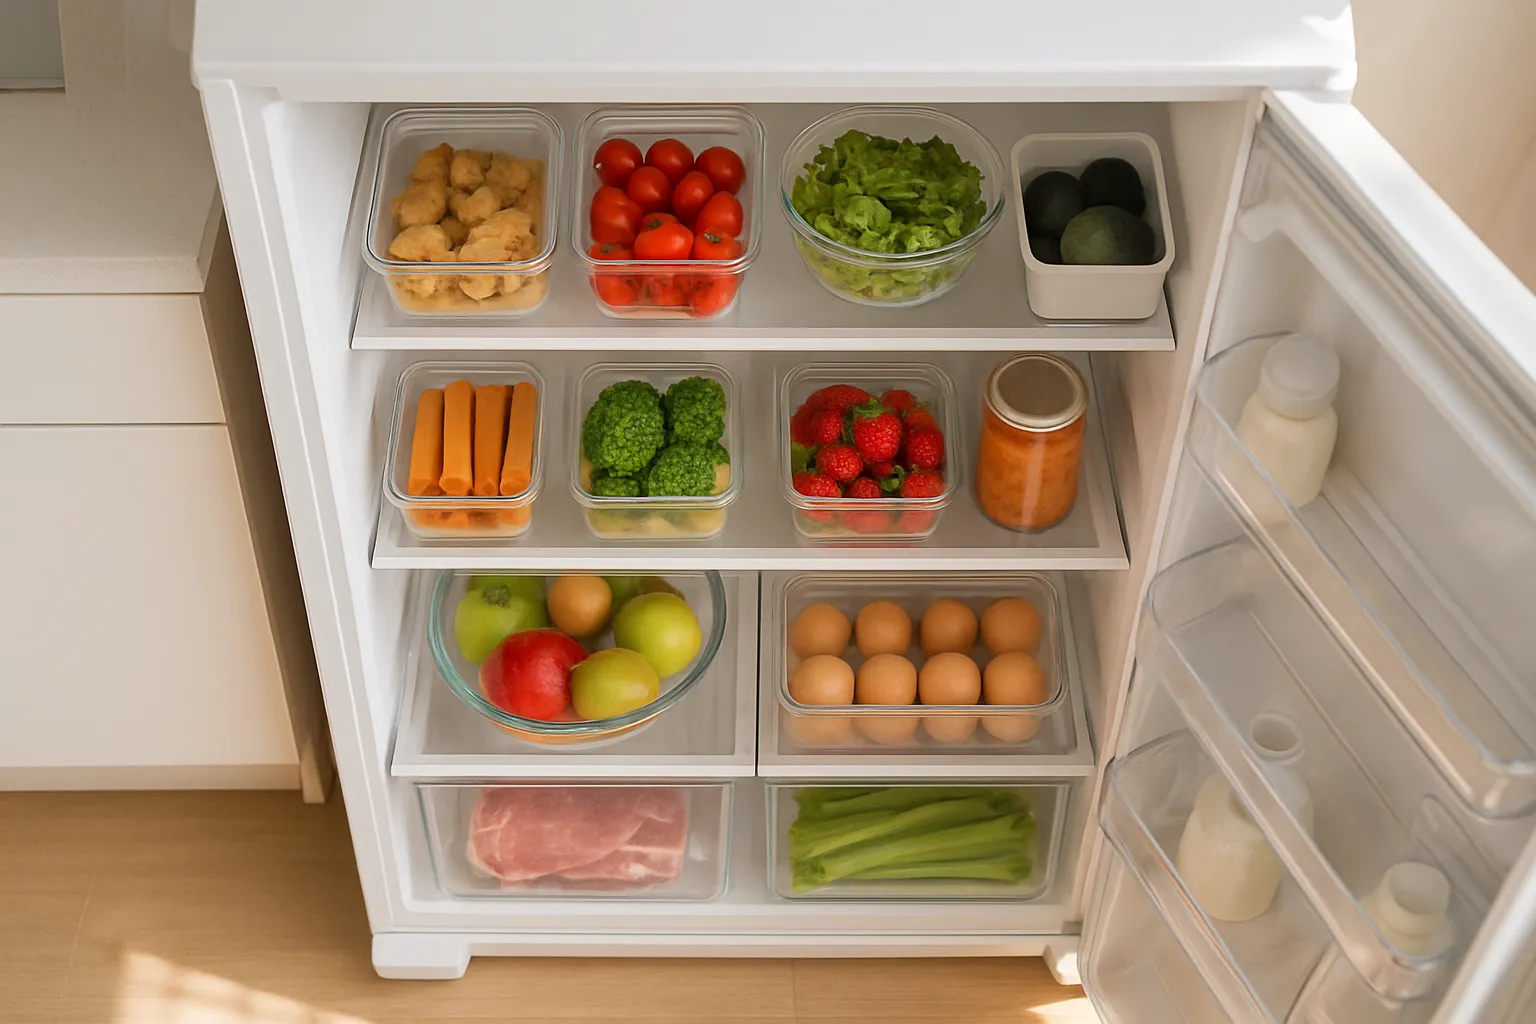
First thing to sort: temperature and a simple layout that everyone can follow. Keep the fridge at 1-4°C and pop a fridge thermometer in there so you can check quickly. Once that’s set, organise by risk and by how you use things.
Top shelf
- Ready-to-eat foods and leftovers go here: cooked meals, deli meats, dips, yoghurts. This keeps them away from raw meat splatter and easy to grab for quick lunches.
- Use clear, shallow containers for leftovers so they cool quickly and stack neatly. Label with the date - leftovers are best used within 3-4 days.
Middle shelf
- Dairy, ready-to-eat proteins and meals for the day. Eggs and milk should live on the main shelves, not the door, because the temperature is steadier.
- Keep a small “kids’ shelf” at a lower middle height: pre-portioned snack tubs, cheese sticks and yoghurt pouches that little hands can reach safely. It encourages independence and cuts down on constant requests.
Bottom shelf
- Raw meat and fish only, tightly sealed and on a tray or in a container to catch leaks. This is the coldest spot and prevents cross-contamination onto ready-to-eat foods.
Crisper drawers
- Use separate drawers for fruit and veg and set the humidity appropriately. High-humidity for leafy greens and veg you want to stay crisp; low-humidity for most fruit. Avoid jamming things in - airflow helps keep produce fresh.
Door
- Condiments, soft drinks and juice cartons belong here. Avoid storing milk, eggs or anything very perishable on the door because it’s the warmest area.
Containers and kit that make life simpler
- Matchable clear containers that stack save space and make it obvious what’s inside. Pick a set of shallow containers for cooked food so it cools quickly and fits on shelves.
- Small plastic bins or baskets group like-with-like: breakfast items, sandwich fillings, lunchbox snacks. Pull the bin out to see everything at once.
- A lazy Susan for jars and sauces is a quiet little miracle; suddenly nothing gets lost at the back.
- Use waterproof labels and a permanent marker for date-and-content - the “what is that?” guessing game disappears.
Practical routines
- FIFO: rotate older items to the front whenever you put groceries away. A quick five-minute tidy after unpacking groceries prevents mystery science experiments later.
- Do a quick check every couple of days: use items that need eating soon and throw out anything mouldy or past its use-by.
- Wipe spills immediately and give the fridge a proper clean weekly. A gentle wipe with warm water and baking soda keeps smells at bay.
Leftovers and quick meals
- Cool leftovers quickly in shallow containers before popping them into the fridge. Label and date them, and freeze anything you won’t eat within 3-4 days.
- Portion batch-cooked meals into family-sized and single-serve containers so reheating for one or many is fuss-free.
Kid-safe and child-friendly tips
- Keep tempting but not-so-healthy snacks out of sight and put fruits, yoghurt and cheese sticks on the low accessible shelf. Little ones feel proud when they can help themselves, and it saves you from constant negotiation.
- If curious hands are a concern, put sharp or choking-risk items up high and use a magnetic child lock on the door if needed.
A couple of small extras
- Keep a small tray with wrapped snacks or cut fruit for quick lunchbox packing.
- A spare clear container for things that need to be used soon makes it easy to gather for today’s meals.
Stick to this basic layout and a couple of tidy habits and the fridge becomes your friend instead of the weekly chaos drawer. It saves time, reduces waste and makes mealtimes less stressful - especially on the crazy mornings.

Fresh herbs and leafy greens can be tricky, but a few simple habits make them last way longer.
Quick prep rules
- Remove rubber bands and twist ties. They bruise stems and make stuff go soggy.
- Trim the stems for herbs and cut the base off big greens like kale or silverbeet.
- Only wash what you plan to eat within a day or two. If you must wash first, dry really well with a salad spinner or clean tea towels.
Herbs: pick the right method for the type
- Soft, leafy herbs (parsley, cilantro, mint, dill): treat like flowers. Trim stems, pop them in a jar with an inch of water, cover loosely with a plastic bag, and keep in the fridge. Change the water every couple of days.
- Basil: does not love the cold. Keep basil stems in a jar of water on the bench, out of direct sun. If it gets too big, make pesto or freeze.
- Woody herbs (rosemary, thyme, oregano): wrap lightly in a damp paper towel and store in a resealable bag in the fridge. They stay fresh for weeks.
- Chives and green onion tops: wrap in a slightly damp paper towel and tuck into a container, or stand in a jar of water in the fridge.
Leafy greens: keep air and moisture balanced
- Lettuce and salad leaves: spin dry, then layer between paper towels in a shallow airtight container or a resealable bag with a little air left inside. Replace the towels if they get damp.
- Spinach, kale, silverbeet: wash and dry, then store in a breathable container or perforated bag with a dry paper towel to soak up excess moisture. Crisper drawer set to high humidity if you can.
- Whole leaves last longer than torn ones, so keep them intact until you need them.
Freezing and long-term tricks
- Blanch hardy greens like spinach, kale and silverbeet quickly, cool in ice water, squeeze dry, then freeze in portioned freezer bags.
- Herbs: chop them, mix with a little olive oil or water, and freeze in ice cube trays. Pop cubes straight into soups, sauces and stews.
- Basil: make pesto, spoon into ice cube trays, and freeze. Great for quick pasta or sandwiches.
Other handy tips
- Label containers with dates. It saves time and avoids that mystery bag at the back of the crisper.
- Use the stems: parsley and cilantro stems are great chopped into stocks, sauces and stir-fries.
- Grow a small windowsill pot of basil, parsley or chives. Fresh snips mean you buy less and waste less.
Little routines go a long way. A quick trim, the right jar or towel, and a tiny bit of attention when you get home from the shops will keep greens and herbs cheerful for days.
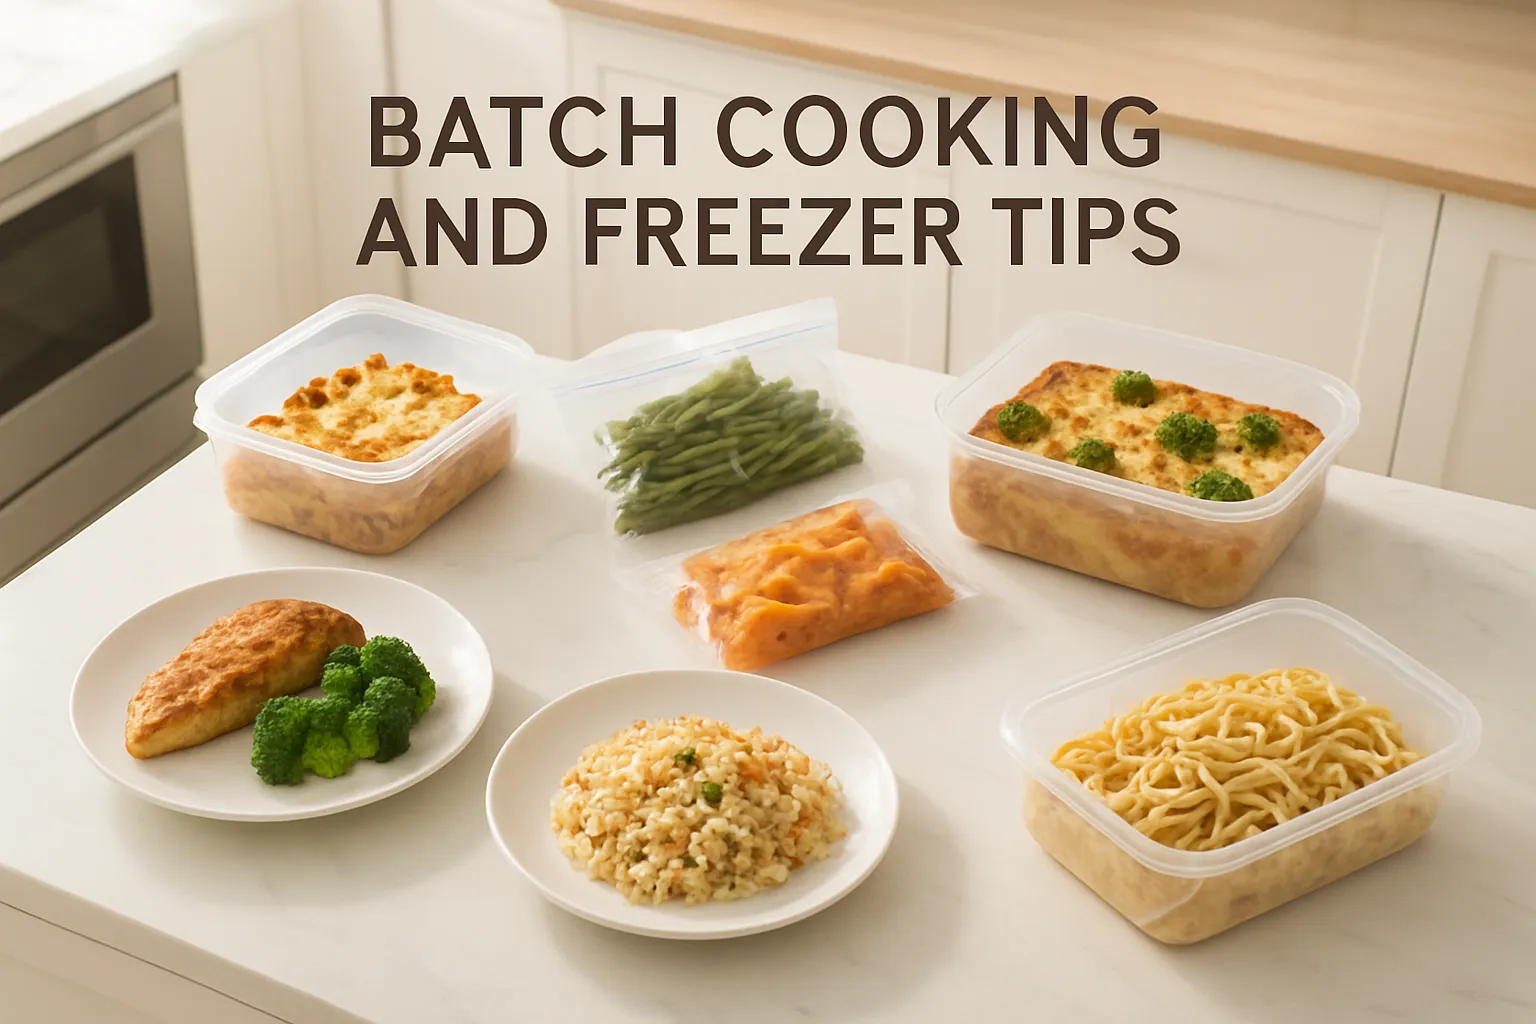
If you loved keeping herbs and greens fresh, batch cooking and a smart freezer will save you even more time and stress. Here’s how to make it work for busy days and picky toddlers.
What to batch cook
- Sauces and ragu. Make a big pot of bolognese or lentil ragu. Freeze in portion sizes for lunches or quick pasta nights.
- Soups and stews. Easy to reheat, great for sneaky veg, and toddler-friendly textures when blended.
- Meatballs and patties. Cooked or uncooked, they freeze well and thaw quickly for wraps, pasta or snacks.
- Baked casseroles and lasagnes. Assemble and freeze before baking, or freeze leftovers already cooked.
- Shredded chicken or pulled pork. Cook in the slow cooker, shred, then freeze in meal-sized bags.
- Mini frittatas and muffins. Cook in muffin tins and freeze individually for breakfast or lunchbox fillers.
- Frozen fruit packs and smoothie cubes. Great for quick smoothies or thawed as a snack.
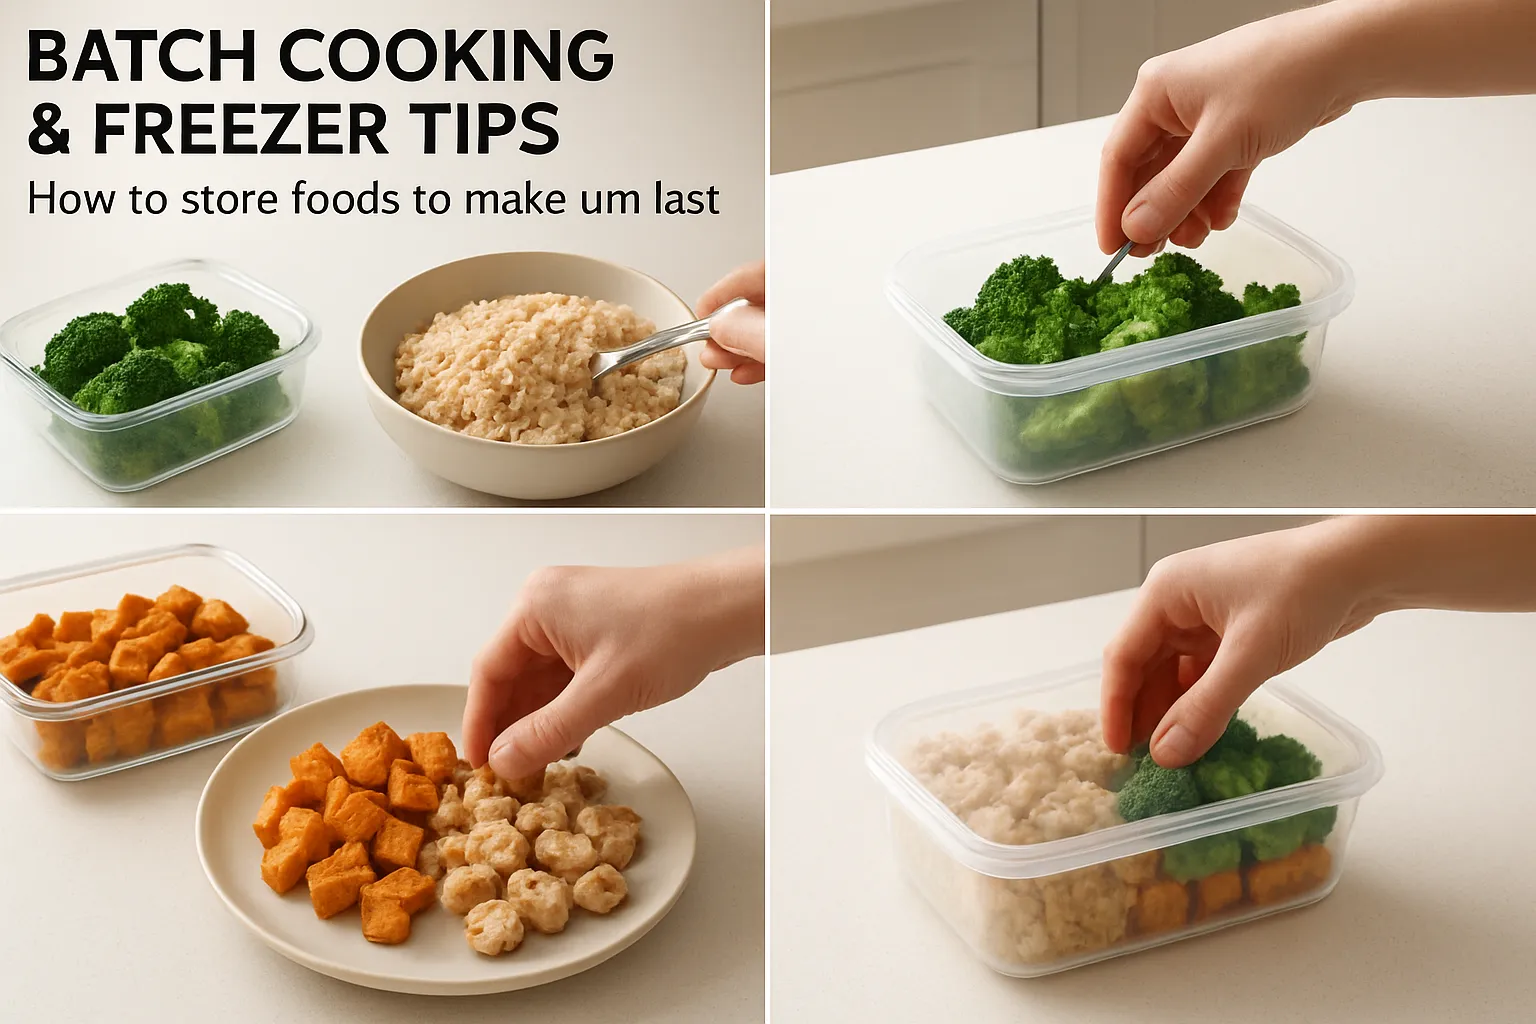
Portioning for toddlers
- Freeze in toddler-friendly portions so you’re not defrosting a whole tray for a small meal. Think ice-cube, muffin tin or small snap-lock bag sizes.
- For purees or baby food, use ice cube trays then pop cubes into a labelled bag.
- Aim for 1/4 to 1/2 cup portions for younger toddlers and up to 1 cup for older little ones, adjusting to your child’s appetite.
Containers and packing
- Use shallow, freezer-safe containers for faster cooling. Leave a little room at the top for expansion.
- Silicone muffin trays, ice cube trays and small glass jars are brilliant for portioning.
- Freezer bags laid flat are space-saving and quick to thaw. Push the air out before sealing.
- Vacuum sealing gives the best longevity and prevents freezer burn, but heavy-duty freezer bags work perfectly too.
Cooling and freezing safely
- Cool hot food quickly before freezing. Shallow containers help and don’t leave hot pots in the fridge for hours.
- Try to get food into the freezer within two hours of cooking.
- Label everything with contents and date. If it’s not labelled, it will be forgotten.
- Best-quality time guide: aim to use most meals within three months. Some things like stocks or bread can last a bit longer, but flavour and texture drop over time.
Thawing and reheating
- Thaw overnight in the fridge when you can. For faster thawing, lay a sealed bag in cold water.
- Reheat until steaming hot throughout, stirring to avoid hot spots, then test before serving little mouths.
- Never refreeze food that’s been fully thawed. If you’ve heated a portion, don’t put leftovers back in the freezer.
Foods that need special prep
- Veggies: blanch tomatoes, peas and green beans before freezing. Leafy salads and cucumbers do not freeze well.
- Rice and pasta: cook slightly underdone so they don’t go chalky when reheated.
- Baked goods: slice bread or loaves before freezing so you can grab a few slices.
- Sauces: tomato and curry sauces freeze brilliantly. Cool completely before bagging.
Avoiding freezer burn and wastage
- Squeeze as much air out of bags as possible. Double-wrap things if they’re going to sit for a while.
- Use smaller containers so you only defrost what you need.
- Keep a simple inventory on the freezer door. A sticky note with dates and contents saves so much time and prevents mystery meals.
Quick batch ideas to try this week
- Double a dinner recipe and freeze half in toddler portions.
- Cook a big pot of soup, blend one portion smooth for little ones, and freeze the rest in meal-size bags.
- Make 24 meatballs: freeze half cooked and half uncooked so you’ve always got options.
- Bake a tray of mini frittatas and freeze individually for breakfasts and snacks.
Little habits that make a big difference
- Spend one hour a week bagging and labelling. It pays back every busy morning.
- Keep a stack of ready-to-freeze bags and containers in the pantry so you’re not hunting when you’ve got food to store.
- Rotate older packs to the front so nothing gets forgotten.
Do a small trial run this week: pick one meal to double, portion it for the kids, freeze a few servings and see how much stress it saves on a chaotic afternoon.
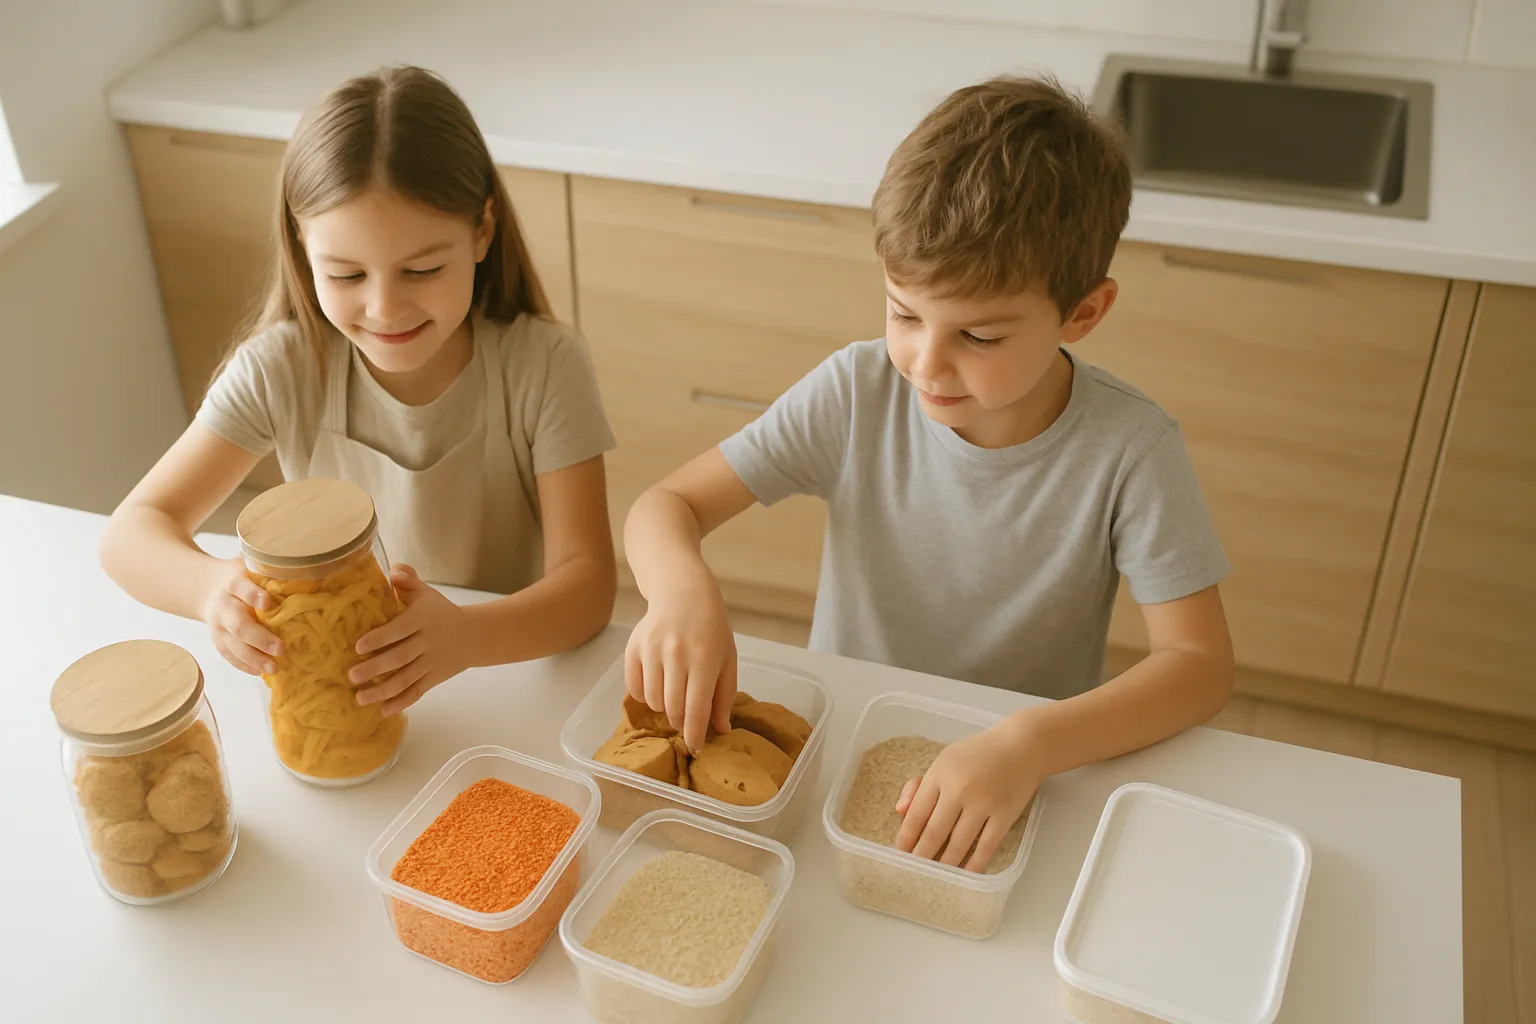
Now for the fun part: getting the kids involved. Small tasks not only cut down your workload, they teach responsibility and make the kitchen run smoother. Here are simple, practical ways to bring children into the storage routine, broken down by age and with safety and organisation tips.
Age-friendly tasks
- Toddlers (1-3 years)
- Put plastic tubs and lids into a low basket. Make lid matching a game.
- Return snack pots to the child-height bin after eating.
- Wipe up small spills with a damp cloth.
- Hand you items from a low shelf while you put away heavier things.
- Preschoolers (3-5 years)
- Sort snacks into labelled baskets: crackers here, fruit pouches there.
- Help match containers to lids and stack them neatly.
- Check best-before dates with a quick show-and-tell.
- Fill small snack boxes for the day under supervision.
- School kids (6-10 years)
- Read labels and help rotate stock using first-in first-out.
- Portion out freezer meals into marked containers and date them.
- Keep a simple inventory list on the pantry door and tick items off.
- Pack their own school lunch from approved shelf options.
Kitchen set-up that helps kids succeed
- Create a low snack station with open-front bins or shallow drawers for quick access.
- Use clear containers and picture labels so non-readers know what goes where.
- Picture charts above shelves show where things belong. A photo beats a thousand reminders.
- Use a small step stool with non-slip feet so kids can reach safely without climbing on chairs.
- Offer child-size tools: small Tupperware, plastic tongs, soft cloths, and lightweight scoops.
Safety first
- Keep glass, heavy cans and hot items out of reach.
- Store knives and sharp tools in a locked drawer or high cabinet.
- Don’t let kids climb to reach things. Teach them to ask instead.
- Make handwashing a rule before handling food and after touching rubbish or pets.
- Supervise anything involving the fridge or freezer until they understand proper handling.
Make it easy and fun
- Turn clean-up into a race: set a timer and see how many tubs they return correctly.
- Use sticker charts for consistent helpers and small, immediate rewards like choosing dinner music.
- Sing a tidy-up song while putting things away so it becomes a habit.
- Let them personalise a bin or label with a sticker so they feel ownership.
- Offer simple choices: “Do you want the apple slices on the top or bottom shelf?” Choices build independence.
Practical tips for keeping momentum
- Start with one repeatable job, like returning containers, then add more as they master it.
- Keep a small box of frequently used kid-safe containers at their level.
- Do a five-minute “kitchen tidy” together after dinner so it stays manageable.
- Praise specific actions: “Thanks for stacking lids neatly - that really helps.”
Getting kids to help with storage takes a bit of training up front, but once it’s part of the routine you’ll notice fewer lost lids, easier lunch-packing, and a whole lot less nagging. Keep tasks short, safe and fun, and watch them take pride in their little jobs.
Browse Cuisines
From the Blog
Cyber Dad’s Quick Roasts
Just a couple of cosy, no-fuss tricks I reach for when the weather makes everyone want to hibernate. Easy swaps and tiny rituals keep sips coming and a bit of fibre tucked in without a meltdown.
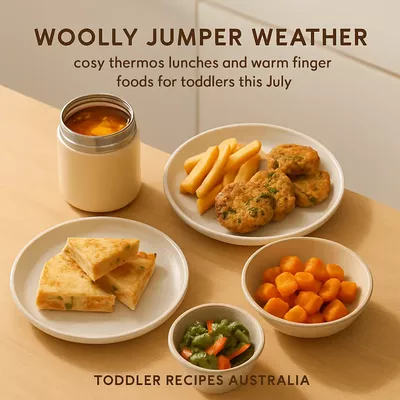
If you want a hot lunch that actually stays hot by pickup time, Steve has a handful of simple tricks that save the day. They’re quick, practical and have rescued many soggy pasta afternoons.

 Never miss a recipe from us, subscribe to our newsletter